PIM Smart Scan 360 lets you capture a full 360° photo of every area during an inspection and automatically turns them into an interactive virtual tour attached to the property condition report. (See the overview for a quick summary, or read on for the full step-by-step). Two AI features run in the background as you go:
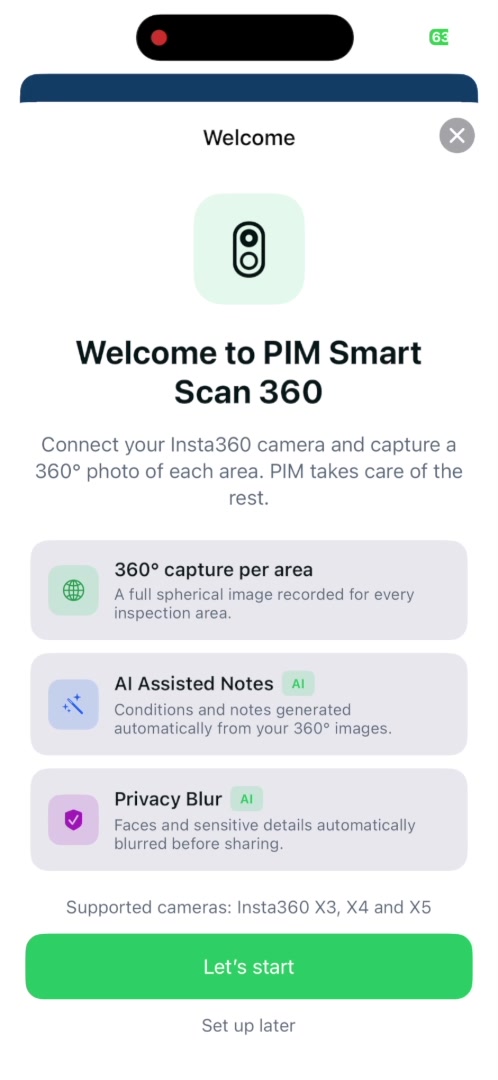
- 360° capture per area — a full spherical image recorded for every inspection area
- AI Assisted Notes — conditions and notes generated automatically from your 360° images
- Privacy Blur — faces and sensitive details automatically blurred before sharing
Note: To get started with PIM Smart Scan 360, register your interest directly in the PIM app under Settings > Advanced > 360. PIM Smart Scan 360 is compatible with the Insta360 X3, X4 and X5 cameras. |
Contents
- Step 1: Start PIM Smart Scan 360
- Step 2: Get your camera ready
- Step 3: Connect your camera
- Step 4: Work through your 360° areas
- Step 5: Capture the 360° photo
- Step 6: Review, retake or add more
- Step 7: Blur faces and sensitive details (Privacy Blur)
- Step 8: Let AI do the paperwork
- Step 9: Finish and view your virtual tour
Step 1: Start Smart Scan 360
Open the inspection, then tap Inspection Areas. Tap the ••• (more) button in the top right, then choose Capture 360° Photos.
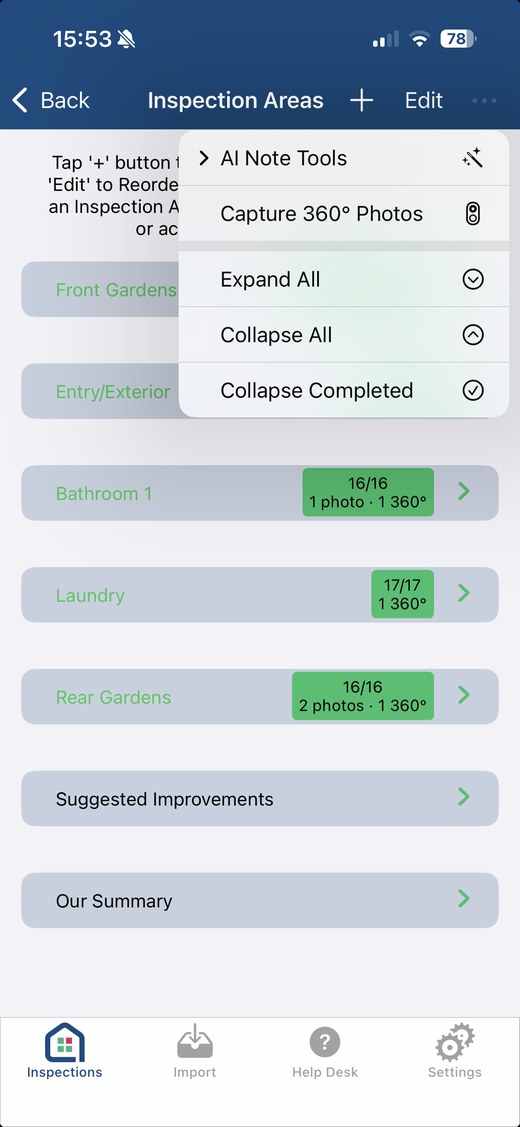
This opens the Smart Scan 360 welcome screen — tap Let's start to begin setup (or Set up later if now isn't a good time).
Step 2: Get your camera ready
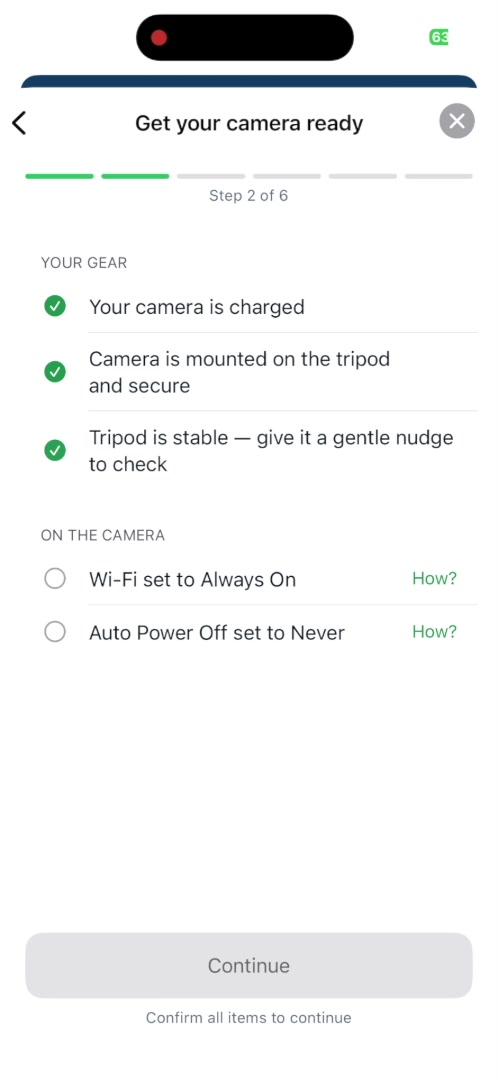
Step 2 of the setup checklist confirms your gear is ready:
- Your camera is charged
- Camera is mounted on the tripod and secure
- Tripod is stable — give it a gentle nudge to check
Then two settings on the camera itself. These aren't on by default, so switch them on before you start:
- Wi-Fi set to Always On
- Set the capture mode to 360° (some newer cameras do this automatically)
- Turn on HDR for your photos
- Open the camera's Settings (swipe down or tap the settings icon)
- Turn Wi-Fi on and set it to stay on the whole time
- Auto Power Off set to Never
- In the same menu, find Auto Sleep and Auto Power Off (some cameras show these separately)
- Turn both off so the camera stays awake for the whole inspection
Menu names vary a little between camera models. Can't find a setting? Tap the How? link next to it in the app. Continue unlocks once everything's checked off
Step 3: Connect your camera
Turn your camera on and wait for it to appear on the Connect screen, then tap Connect. If iOS asks to join the camera’s Wi-Fi, tap Join.
The app checks that your phone’s Wi-Fi and Bluetooth are on and that Location is enabled for PIM, then lists any discovered devices along with their mode, battery level and free storage. Tap Connect, then Continue. If your camera doesn’t show up, use the Trouble connecting? link.
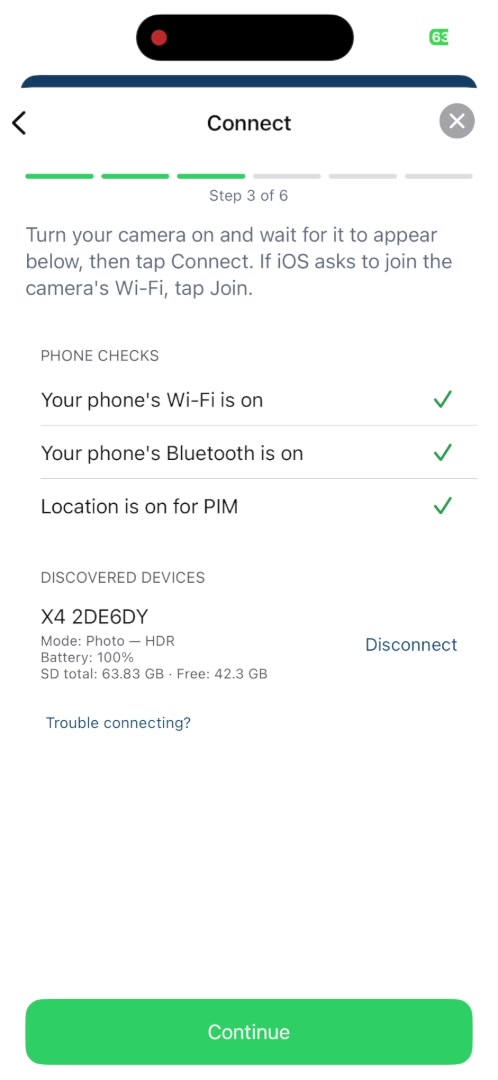
Note: Setup continues for a few more steps after this (up to step 6 of 6) to finish preparing your device — follow the on-screen prompts to complete them. |
Step 4: Work through your 360° areas
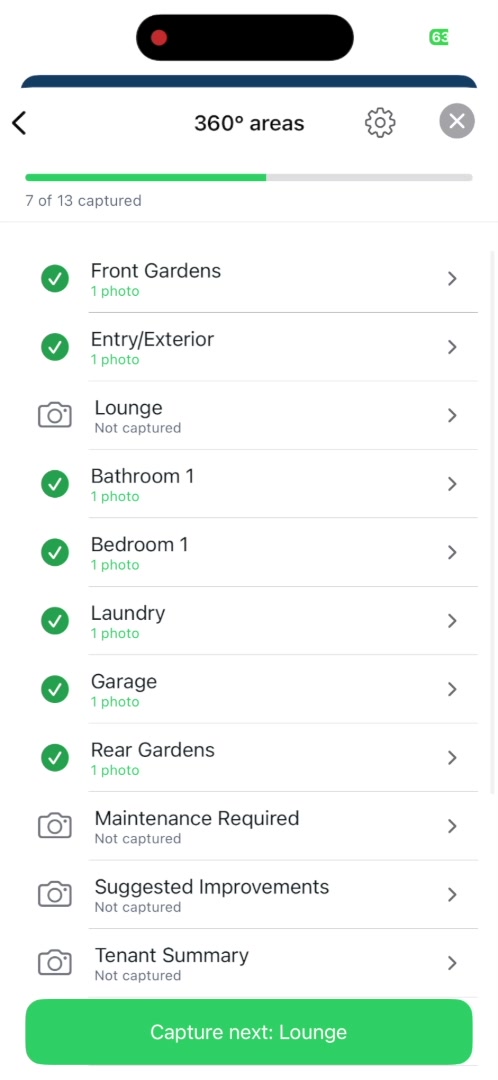
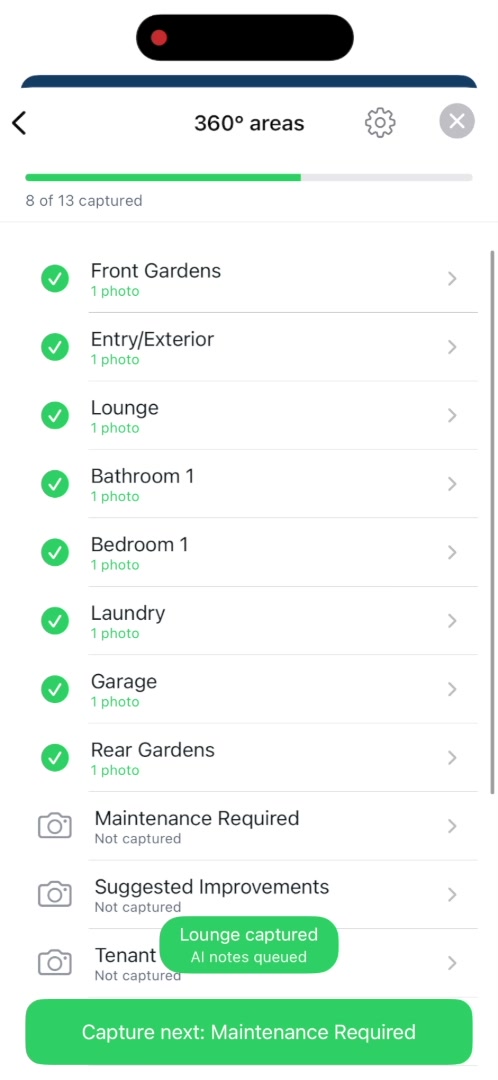
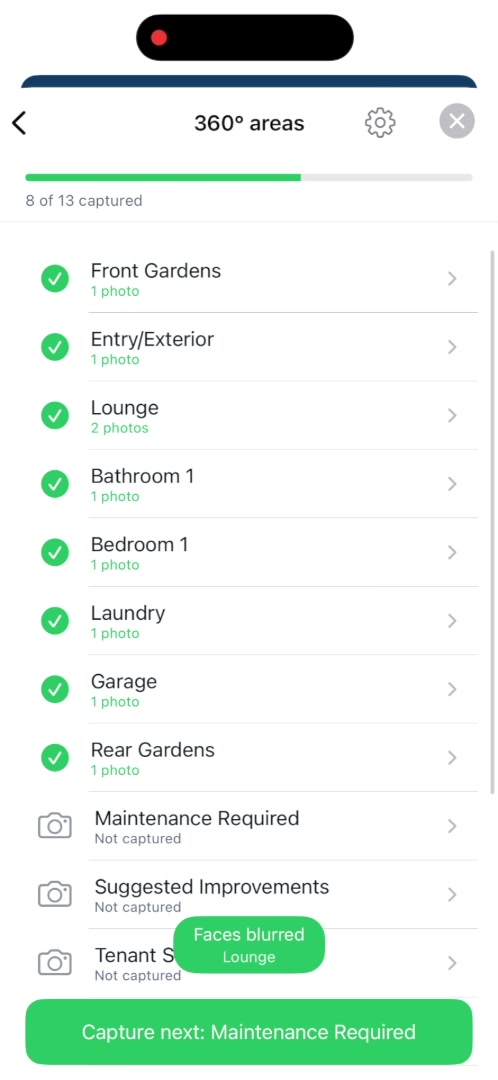
Once setup is complete, you’ll land on the 360° areas hub. This lists every area in the inspection (e.g. Front Gardens, Entry/Exterior, Lounge, Bathroom 1, Bedroom 1, Laundry, Garage, Rear Gardens, plus areas like Maintenance Required, Suggested Improvements and Tenant Summary), with a running count of how many you’ve captured. Tap the green Capture next button, or select any area directly, to jump in.
Step 5: Capture the 360° photo
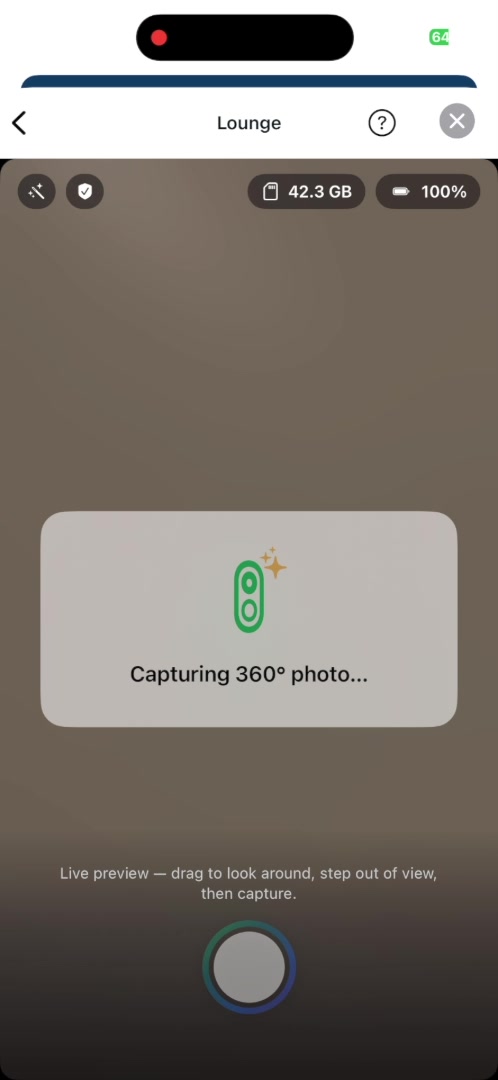
Inside an area, use the live preview to drag and look around the room, step out of view, then tap the shutter button to capture the 360° photo.
Step 6: Review, retake or add more
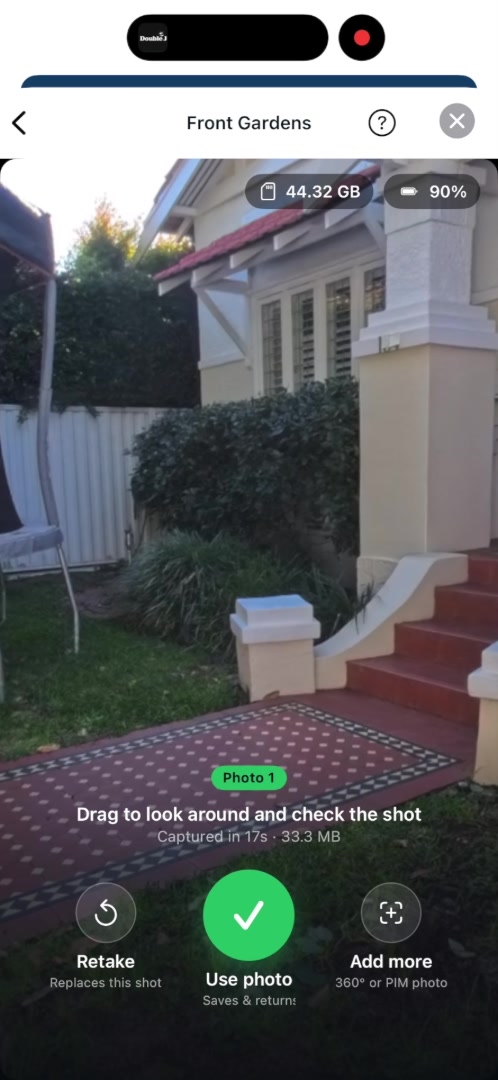
After capturing, drag around the shot to check it, then choose:
- Retake — replaces this shot
- Use photo — saves it and returns you to the area list
- Add more — add another 360° or standard PIM photo to this area
Step 7: Blur faces and sensitive details (Privacy Blur)
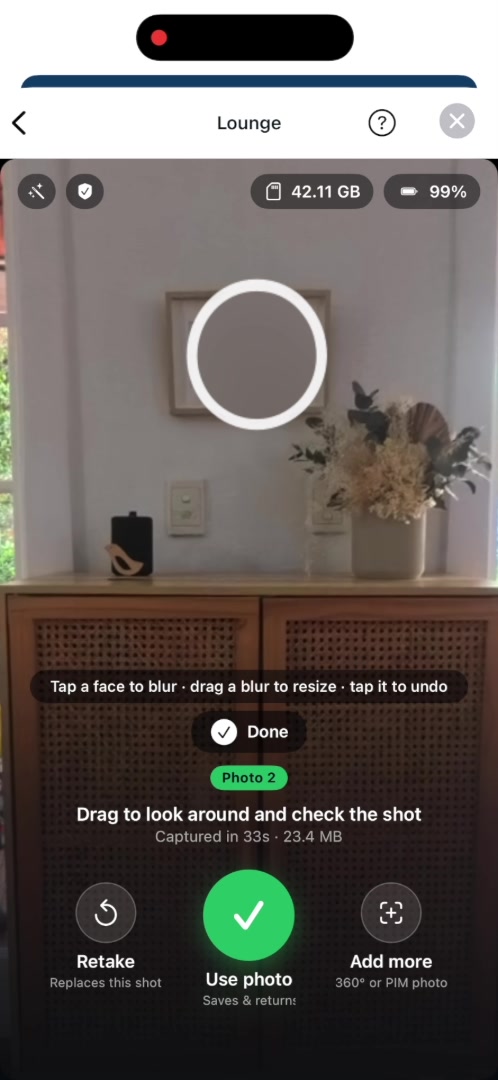
Before saving, Privacy Blur lets you protect anyone or anything caught in the shot: tap a face to blur it, drag a blur to resize it, or tap a blur again to undo it. Tap Done once you’re happy with the result.
Step 8: Let AI do the paperwork
As soon as you use a photo, PIM Smart Scan 360 gets to work in the background. You’ll see quick confirmation toasts on the areas list:
- “[Area] captured · AI notes queued” — AI Assisted Notes is generating conditions and notes from your 360° image
- “Faces blurred” — confirms Privacy Blur has been applied to that area’s photo
Repeat steps 4–8 until every required area is captured.
Step 9: Finish and view your virtual tour
Once you've worked through your areas, complete and submit the inspection as normal. If the report includes 360° photos, the submitted report automatically embeds a virtual tour link. The numbered callouts below match the descriptions in the text.
1 Virtual Tour link in the report
Your inspection reports now include a banner with a Virtual Tour link: "This report includes a 360° virtual walkthrough. Click to explore the property room by room." Anyone with the report can click it directly.

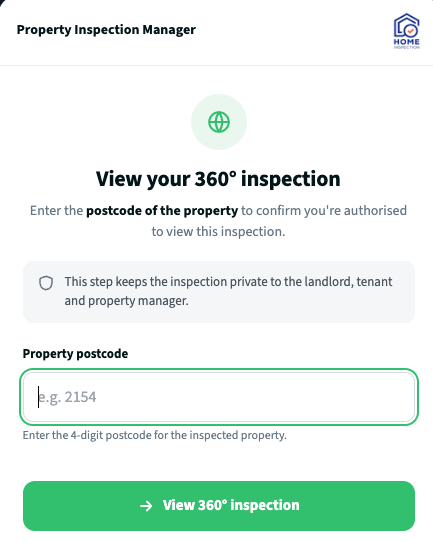
2 Postcode Restriction
The link opens an access screen. Enter the property's postcode to confirm you're authorised to view the inspection — this keeps the tour private to the landlord, tenant and property manager.
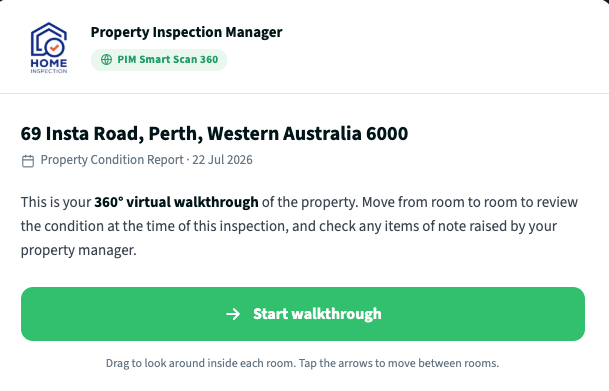
3 Welcome screen
Once through the postcode gate, the welcome screen shows the property address, report type and inspector. Tap Start walkthrough to enter the tour.
Inside the viewer — callouts 4–12
Refer to the annotated screenshot below for the numbered features.
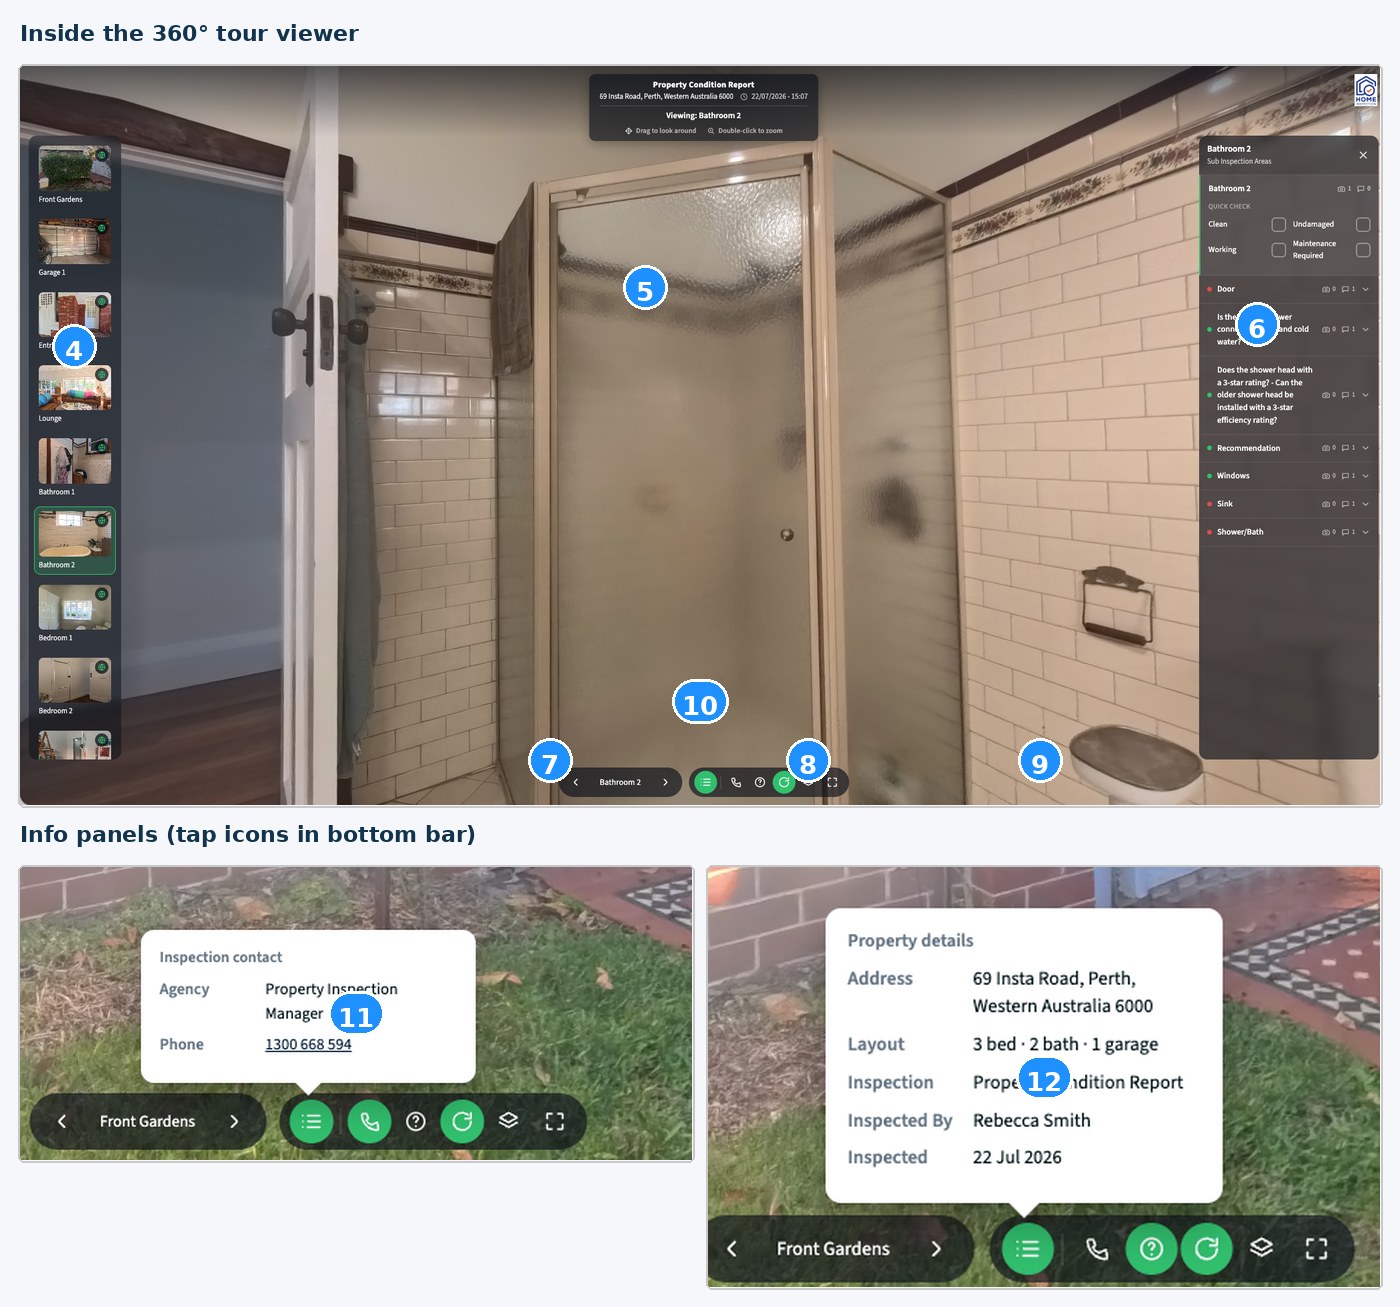
- 4 Area list (left sidebar) — all inspection areas as clickable thumbnails; the active area is highlighted in green. Tap any to jump to that room.
- 5 360° view (centre) — drag to look around the room; double-click to zoom. The view auto-rotates by default.
- 6 Inspection panel (right) — shows the area's Quick Check labels (Clean, Working, Undamaged, Maintenance Required) and all sub inspection areas as an expandable list with conditions, notes and additional photos taken.
- 7 Area navigation — use the < Area > arrows to step through all inspection areas in order.
- 8 Auto-rotate toggle — the rotate icon turns auto-rotation on or off.
- 9 Bottom control bar — icons for the area list, contact details, property info, auto-rotate, photo layers and fullscreen mode.
- 10 360° Photo thumbnail strip — when an inspection area has more than one 360° photo, a 360° thumbnail strip appears above the nav bar; tap a 360° thumbnail to switch 360° shots.
- 11 Inspection contact panel — tap the phone icon to see the agency name and contact number.
- 12 Property details panel — tap the info icon to see the address, layout, inspection type, inspector and date.
Tip: The virtual tour link is always available in the submitted report — share it with your landlord or tenant and they can view it on any device, any time. |
Was this article helpful?
That’s Great!
Thank you for your feedback
Sorry! We couldn't be helpful
Thank you for your feedback
Feedback sent
We appreciate your effort and will try to fix the article