 | Using PIM With Tradify |
Tradify is a job management platform for trades businesses. With PIM's Tradify integration, you can import your scheduled jobs directly into the PIM app, carry out property inspections or assessments on-site, and deliver professional reports — ready to share with clients or attach back to the job in Tradify.
This integration is available to PIM Premium customers. Please contact PIM Support if you need assistance getting started.
Contents
- Exporting Jobs from Tradify
- Upload Your Data File to the PIM Cloud Dashboard
- First Time Set Up
- Import Jobs Into PIM
- Complete the Inspection
Exporting Jobs from Tradify
The first step is to export your scheduled jobs from Tradify as a CSV data file, which is then uploaded to your PIM Cloud Dashboard so it can be synced down to the PIM app on your device.
Coming Soon: Step-by-step instructions for exporting job data from Tradify will be added here shortly. In the meantime, please contact PIM Support and we'll walk you through the process directly. |
Upload Your Data File to the PIM Cloud Dashboard
Once you have your exported CSV file from Tradify, you'll need to upload it to your PIM Cloud Dashboard before it can be used within the PIM app on your device.
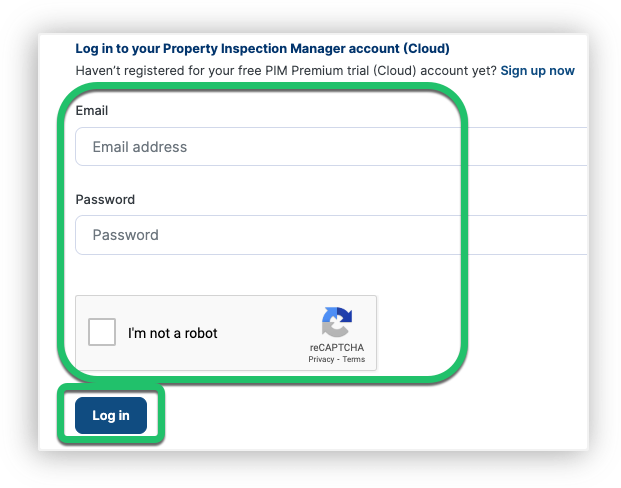
1. Log in to your PIM Cloud Dashboard
From your internet browser, navigate to the PIM Cloud Dashboard and log in using your PIM Premium account credentials.
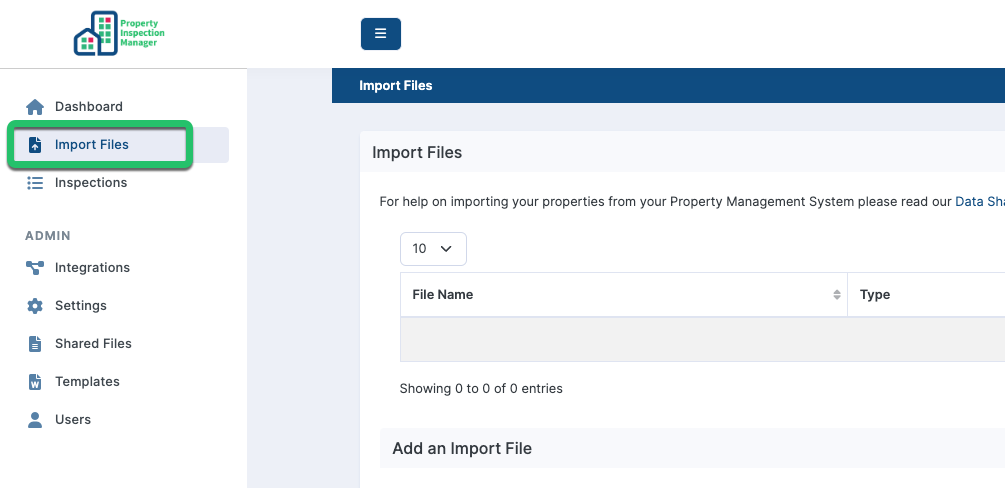
2. Go to the Import Files menu
Once logged in, go to the Import Files menu.
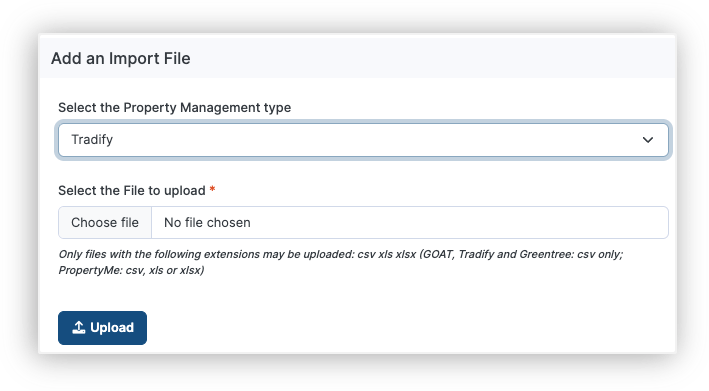
3. Select Tradify and upload your file
Under the Add an Import File section, select Tradify from the Property Management type dropdown, then click Choose File to locate your saved CSV file and click Upload or simply drag and drop. Note that Tradify only supports CSV format.
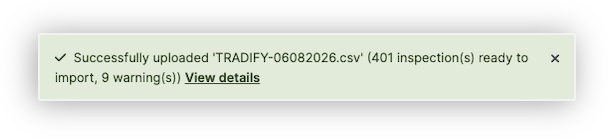
4. Confirm success
A green File Upload Success message will appear near the top tabs once the upload is complete and also any mapping errors encountered. The job status that are processed include
- Inspection Booked
- Treatment Booked
- Lab Testing Booked
- Retreat Inspection Booked
- Return To Site Booked
- Parts Delivery Booked
- Parts Pickup Booked
First Time Set Up
Before importing jobs from Tradify, there are a few settings in the PIM app to configure. You only need to do this once.
1. Enable Tradify Integration
In the PIM app, navigate to Settings > Advanced Settings and Integrations and tap Enable Tradify. Once activated, the Tradify Settings screen confirms the connection is live and shows three options to configure:
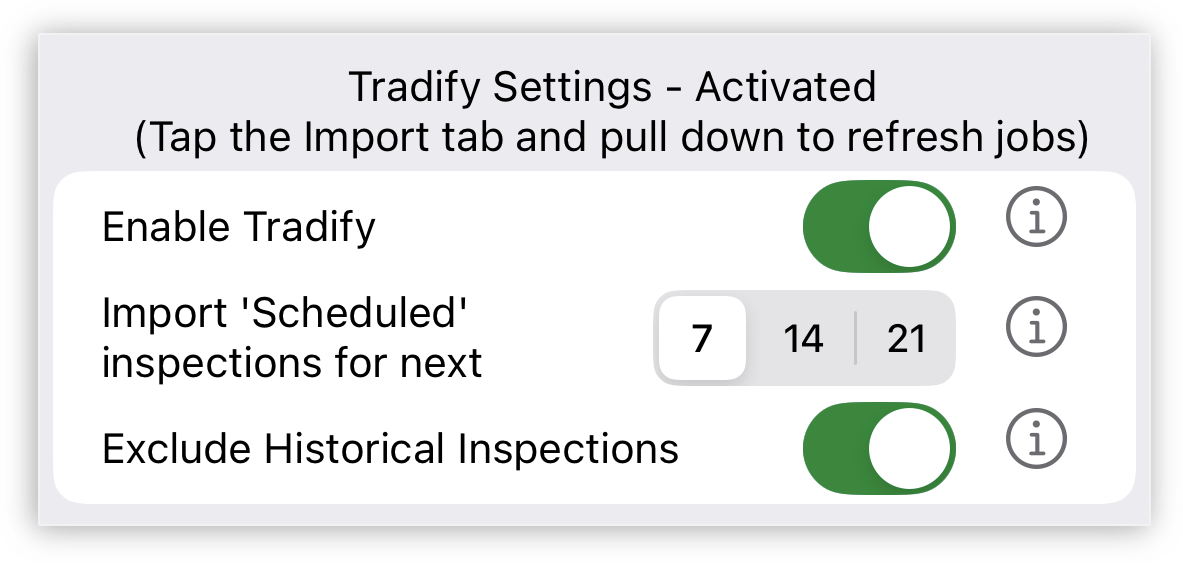
- Enable Tradify — The main toggle to activate the integration. When green, the connection is live. Once enabled, tap the Import tab at the bottom of the app and pull down to refresh and retrieve your jobs.
- Import 'Scheduled' inspections for next — Choose how many days ahead PIM looks when fetching jobs from Tradify. Select 7, 14, or 21 days depending on how far ahead your jobs are typically booked.
- Exclude Historical Inspections — When turned on, only upcoming and future jobs appear in the import list, keeping past jobs out of the way. We recommend keeping this on to avoid clutter.
2. Confirm Inspectors
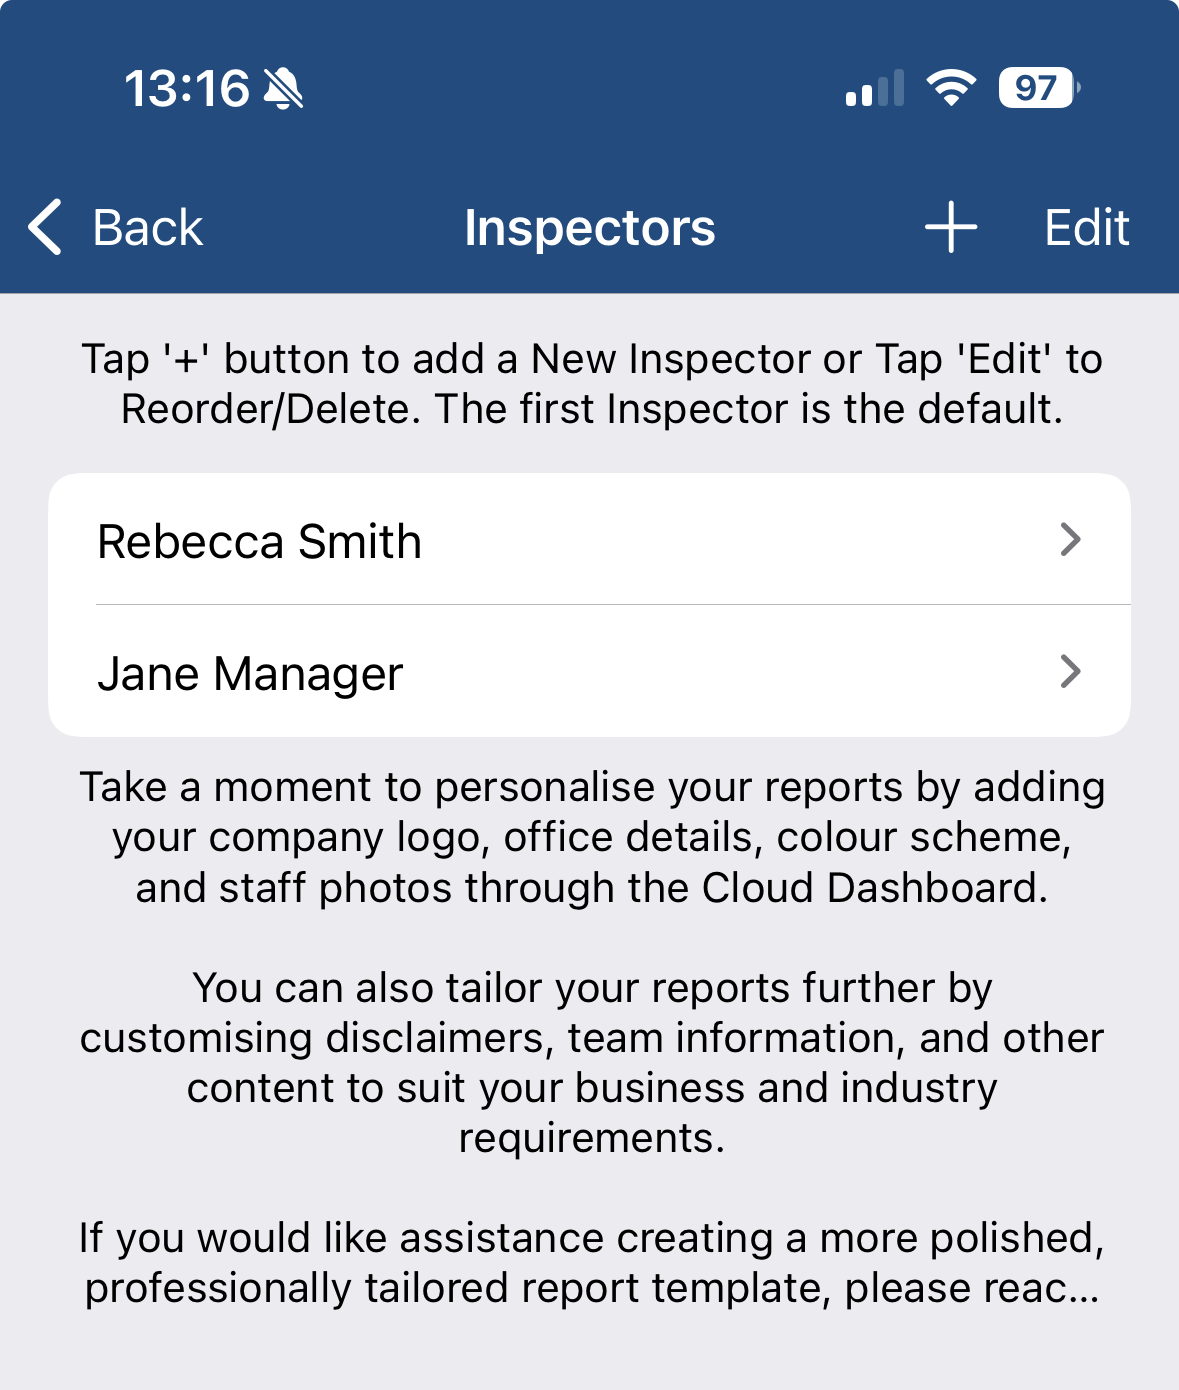
PIM will assign each imported job to a Default Inspector — the inspector at the top of your list under Settings > PIM Admin > Inspectors. See the Inspectors Guide for more information.
3. Smart Property Profiles
When importing from Tradify, PIM uses your Default Property Profile for each job. This defaults to House — 3 Bedroom 2 Bathroom. You can change the default or create new profiles to match your most common job types under Settings > PIM Admin > Smart Property Profiles. After importing, you can always adjust the room layout within the individual inspection before starting.
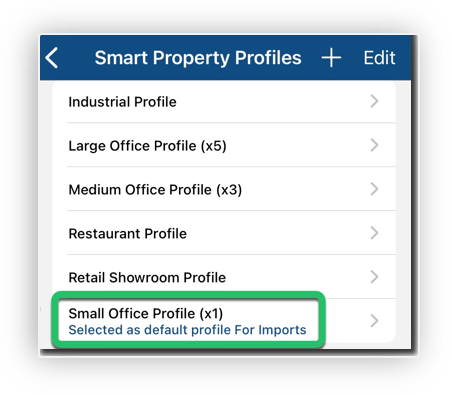
See the Smart Property Profiles Guide for more information.
4. Assign a Default Inspection Type
During import, PIM uses the default Inspection Type set under Settings > PIM Admin > Inspection Type — for example, a Property Inspection Report or Property Condition Report.
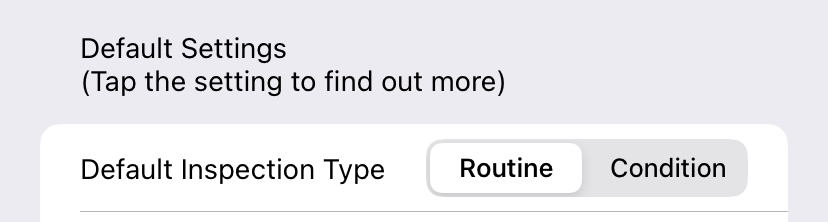
See the Inspections & Inspection Types Overview for more information.
Import Jobs Into PIM
PIM imports your job data from the Dashboard using the process below.
1. Navigate to the Import tab
This is at the bottom of the app.

2. Refresh and open your data file
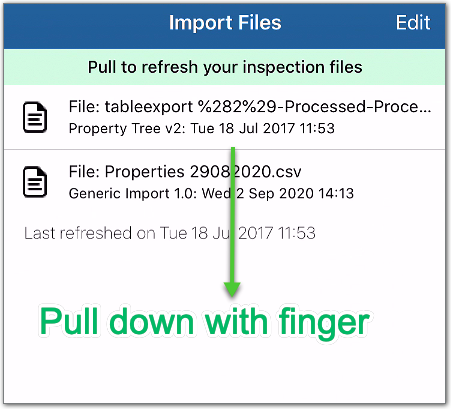
Pull down on the screen to refresh. Once your file appears, tap it to open.
3. Review your jobs
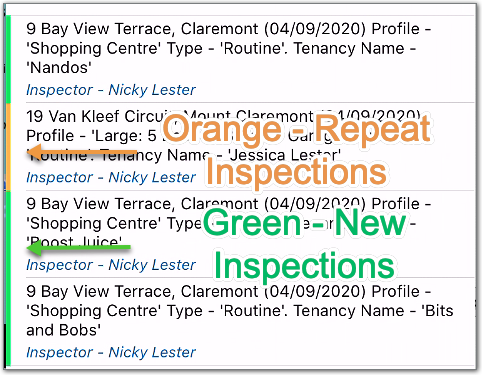
Each job is listed with a colour indicator on the left. Green means PIM hasn't seen this property before — it will be created as a new inspection. Orange means the property already exists on your device — a Repeat Inspection will be created.
4. Filter and Sort if required
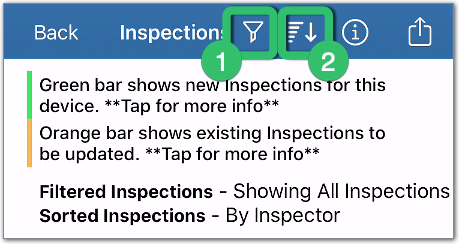
If the list is large, use the Filter (1) or Sort (2) options to narrow it down.
5. Import the jobs
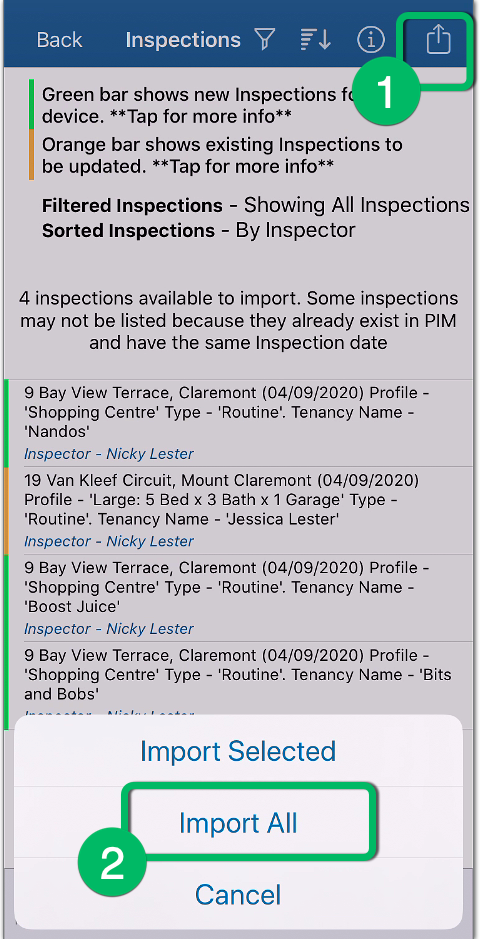
Tap the Action button (1) and choose one of the Import options (2). To import selected jobs only, press Cancel first, tap the jobs you want to select (a checkmark will appear), then choose Import Selected.
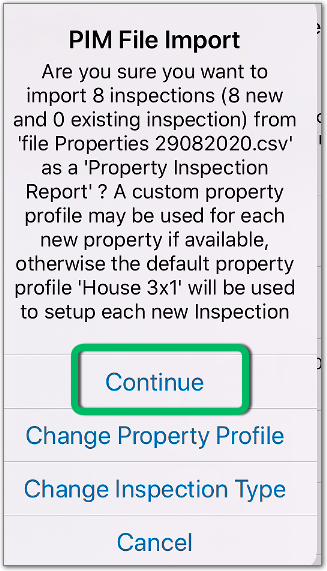
6. Confirm the import
PIM will show the Property Profile and Inspection Type it will use. If you are happy with this, tap Continue.
7. Close the confirmation
Take note of the confirmation message, then tap OK to close.
Complete the Inspection
Your imported jobs will now appear under the Inspections tab. Go ahead and complete the inspection as you normally would — add notes and photos — then tap Submit Inspection when done. Submitting will email you a PDF copy of the report and upload it to your PIM Cloud Dashboard for download and sharing.
For PIM-related questions, please contact PIM Support.
Was this article helpful?
That’s Great!
Thank you for your feedback
Sorry! We couldn't be helpful
Thank you for your feedback
Feedback sent
We appreciate your effort and will try to fix the article