 | Using PIM With GreenTree |
Using PIM with Greentree
Data sharing between Greentree and PIM is simple for PIM Premium users. With a single tap, you can import your upcoming scheduled inspections straight into PIM.
After completing your inspections in PIM, the reports are emailed directly to you. You can then attach them to the corresponding property in Greentree, making it easy to continue with any follow-up tasks.
Tip: It is best to ensure your inspections in GreenTree are marked with an active inspection date. If this field is left blank in the data file, the inspection date will be set to the date of import into PIM, so please make sure the next inspection date is set correctly before exporting. PIM will also automatically collate the OHS Alerts (True/False) and Electronic Consent (Yes/No) data from your file, displaying it as helpful information in the Property Info field. For example, it may appear as "OHS Alert: True, Electronic Consent: No". |
Contents
- Exporting Inspections from GreenTree to a Data File
- Upload Your Data File to Your PIM Cloud Dashboard
- First Time Set Up
- Import Your Inspections Into PIM
- Completing the Inspection in PIM
- Attach Your Inspection Report to GreenTree
Exporting Inspections from GreenTree
Once logged in to your GreenTree account portfolio, you can export your inspection data.
Select CRM > Asset Management > Physical Assets from the menu.

Then select the Explorer icon inside the window.

Under the Saved Selections dropdown, select the 'Rental/Asset/Inspection Date' report, then choose Export. This will generate a Greentree data file titled with the current date, for example GreenTree_18062026.csv.

Upload Your GreenTree Data File to the PIM Cloud Dashboard
You will need to upload the new file to your online account before it can be used within the PIM app on your iOS device.
1. Login to your PIM Cloud Dashboard
From your internet browser, navigate to the PIM Cloud Dashboard and log in using your PIM Premium account credentials.

2. Go to the Import Files menu
Once logged in, go to the Import Files menu.

3. Upload your file
Under the Add an Import File section, either click Choose File to locate your saved CSV file, or drag and drop the file directly into the upload area. Once your file is selected, click Upload to proceed. PIM will automatically detect the GreenTree format based on the file you upload.

4. Confirm success
A green File Upload Success message will appear near the top tabs once the upload is complete.

First Time Set Up
The ability to import your GreenTree data files relies on information held in your PIM settings, so it is important to know how yours is set up. You only need to do this once.
1. Enable Greentree Integration
Navigate to Settings > Advanced, Integrations About the App > Enable GreenTree.

Also ensure 'Exclude Historical Inspections' is toggled On to display only upcoming or future inspections, and adjust the import date range to show inspections for the next 30, 60 or 90 days.
Prepare For A Successful Import
1. Confirm Inspectors
PIM will assign each inspection to a Default Inspector, which is the inspector listed at the top of the list in PIM Settings > PIM Admin > Inspectors. See the Inspectors Guide for more information.

2. Assign a Default Inspection Type in PIM
During import, PIM will use the default Inspection Type assigned in PIM Settings > PIM Admin > Inspection Type for new inspections.

See the Inspections & Inspection Types Overview for more information.
3. Smart Property Profiles
In the Greentree import process, since the Property Profile information is not set, PIM will use the default property profile for imports. This can be modified in Settings > PIM Admin > Smart Property Profiles. To set up your specific PIM Smart Property Profiles, refer to the Smart Property Profiles Guide for more information.

Turn on Quick Check Labels (optional)
Another time-saving feature is to have the quick check labels ticked by default. To set this, go to Settings > PIM Admin, select your Routine or PCR inspections, and toggle 'Quick Check Always Ticked' to the On position. See the Customised Settings Guide for more information.

Import Inspections Into PIM
PIM imports property data from the Dashboard using the process below.
1. Navigate to the Import tab
This is at the bottom of the app.

2. Import the latest files from your online account
Pulling down on the screen will refresh the data files. Once your file appears, tap to open it.

3. View imported inspections
Your properties will be listed with a colour code on the left. Green indicates a property PIM has not seen before, so it will be treated as a new inspection. Orange represents an existing property, so a Repeat Inspection will be created.

4. Filter and Sort if required
If there are a large number of properties in the imported list, you can use the Filter (1) or Sort (2) options to make things easier to view.

5. Import the inspections
When you are ready to complete the import, select the Action button (1), then choose one of the Import options (2).

Note: if you only want to import some inspections, press cancel, then tap against the properties you want. This will place a check on the right. You can then choose the Import Selected option instead of Import All.
6. Confirm the import type
The import will create inspections based on your default Property Profile and Inspection Types displayed in the message. If you are happy with this, tap Continue.

7. Close the PIM File Import message
Take note of the confirmation message, then tap OK to close.
Completing the Inspection in PIM
After importing, your scheduled inspections will be available under the Inspections tab.
Go ahead and complete the inspection in the usual way by adding notes and photos, then select Submit Inspection when done. Submitting the inspection will email you, as the inspector, a copy of the inspection in PDF format.
Attach Your Inspection Report to GreenTree
Once you have submitted your inspection from PIM, you'll receive a PDF copy by email. Follow these steps to attach it to the relevant Service Request in GreenTree.
- Open the Service Request in GreenTree and click the Attachments tab.

- The Attachments for Request window will open. Click the three-dot button (...) next to the Source field.
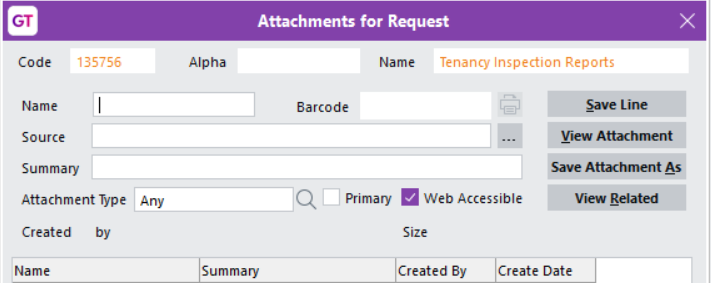
3. Browse to the PIM-generated PDF report you want to attach, select it, and click Open

For PIM related questions, please contact PIM Support.
Was this article helpful?
That’s Great!
Thank you for your feedback
Sorry! We couldn't be helpful
Thank you for your feedback
Feedback sent
We appreciate your effort and will try to fix the article