Managers can create and manage user accounts directly in the PIM Cloud Dashboard, giving each inspector their own personal login. This guide covers creating accounts, setting roles, and sending login details.
Contents
Account roles
Every PIM user is assigned one of two roles when their account is created.
| Role | What they can do |
|---|---|
| Manager | View, edit and archive inspections for all inspectors Create and manage user accounts • Reset passwords Update company settings — logo, branding, office details Manage Integrations |
| Inspector | View and manage their own inspections Sync inspections between the PIM app and the Cloud Dashboard |
Creating a user account
| 1 | In the Dashboard, go to Users then tap Add User. 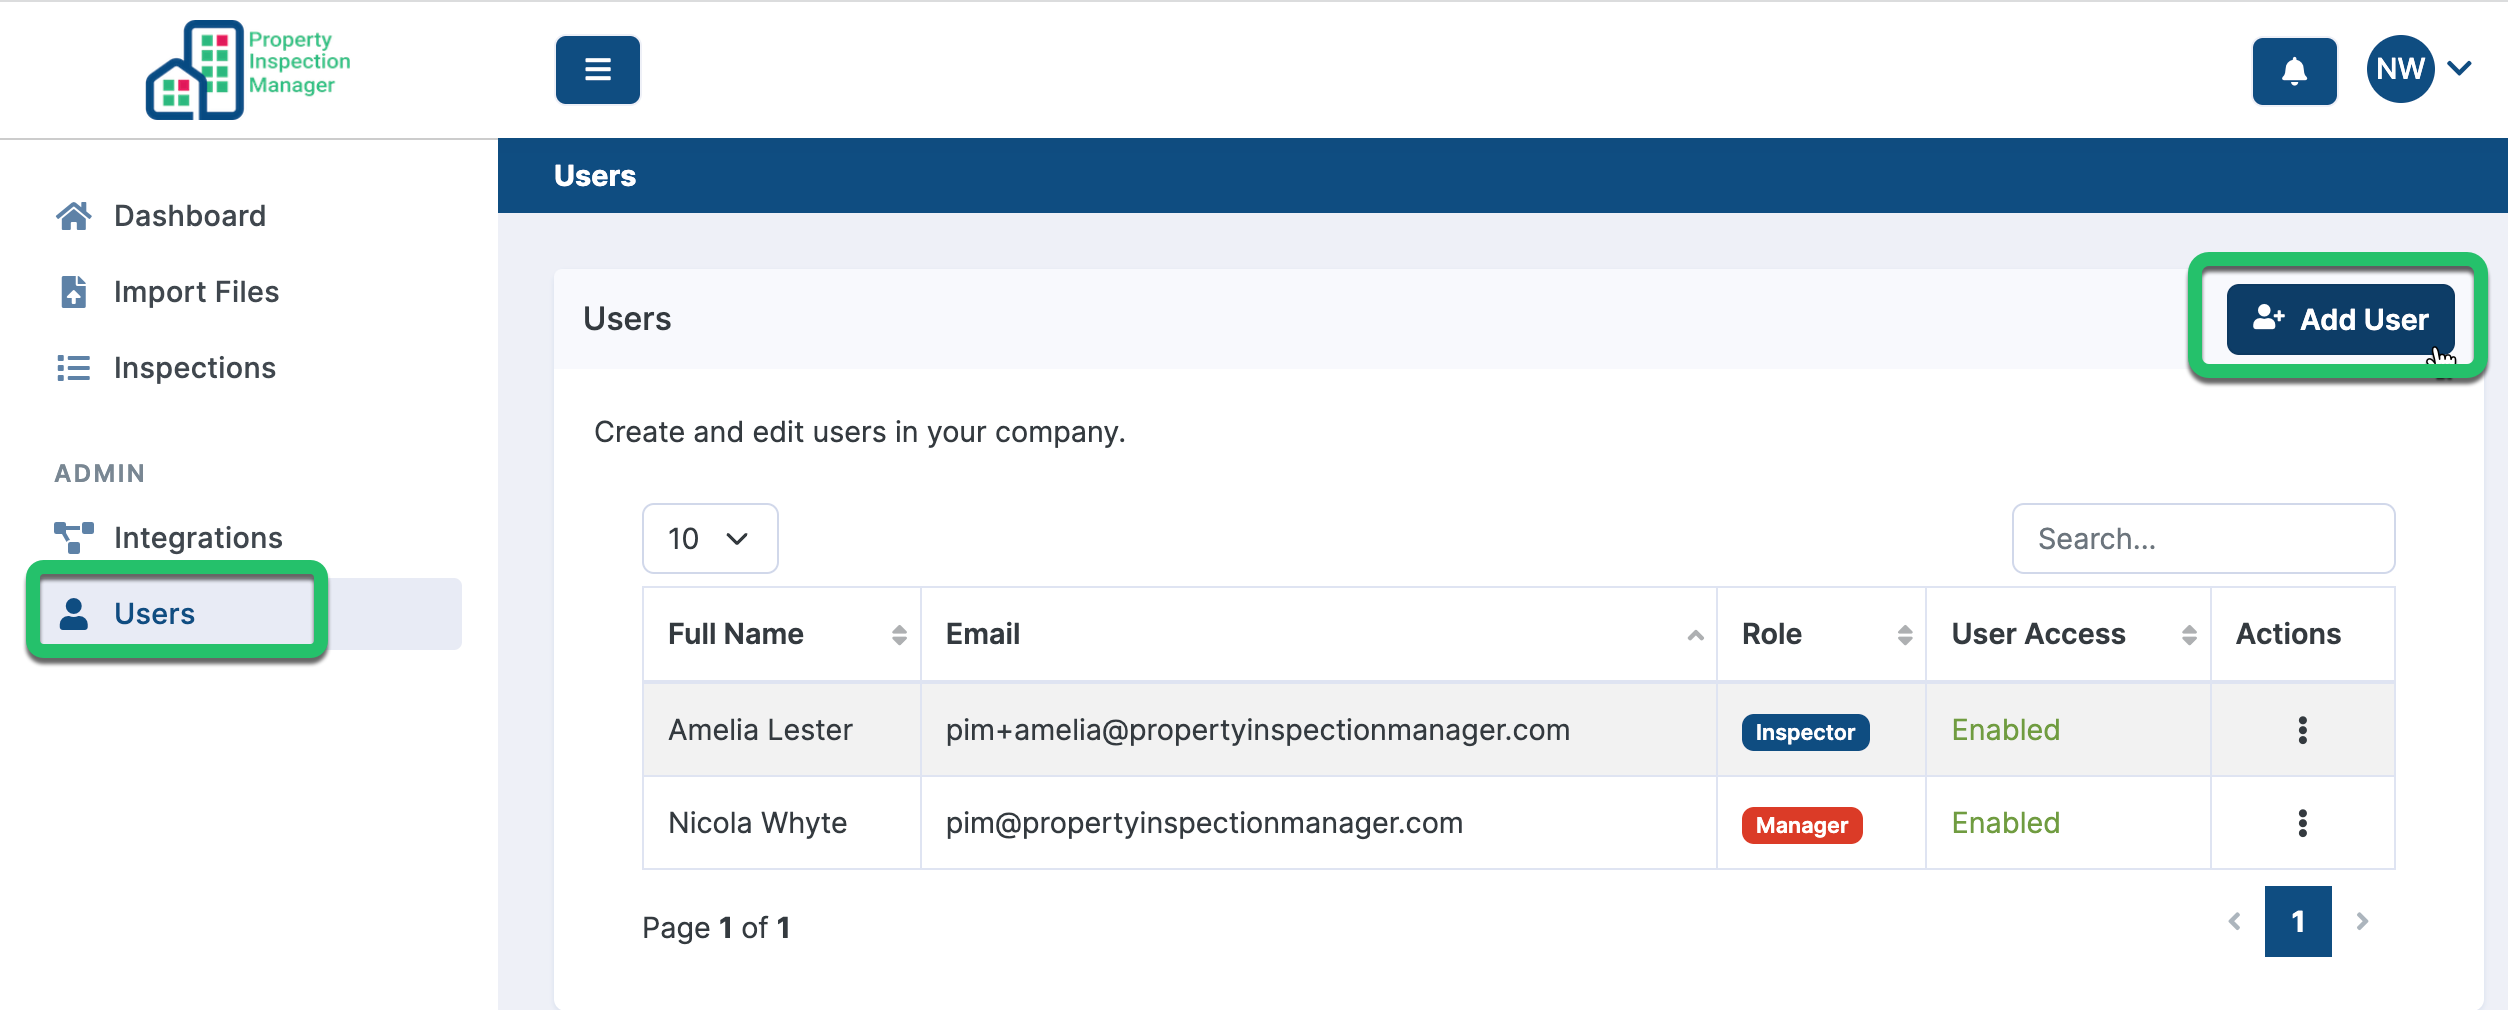 |
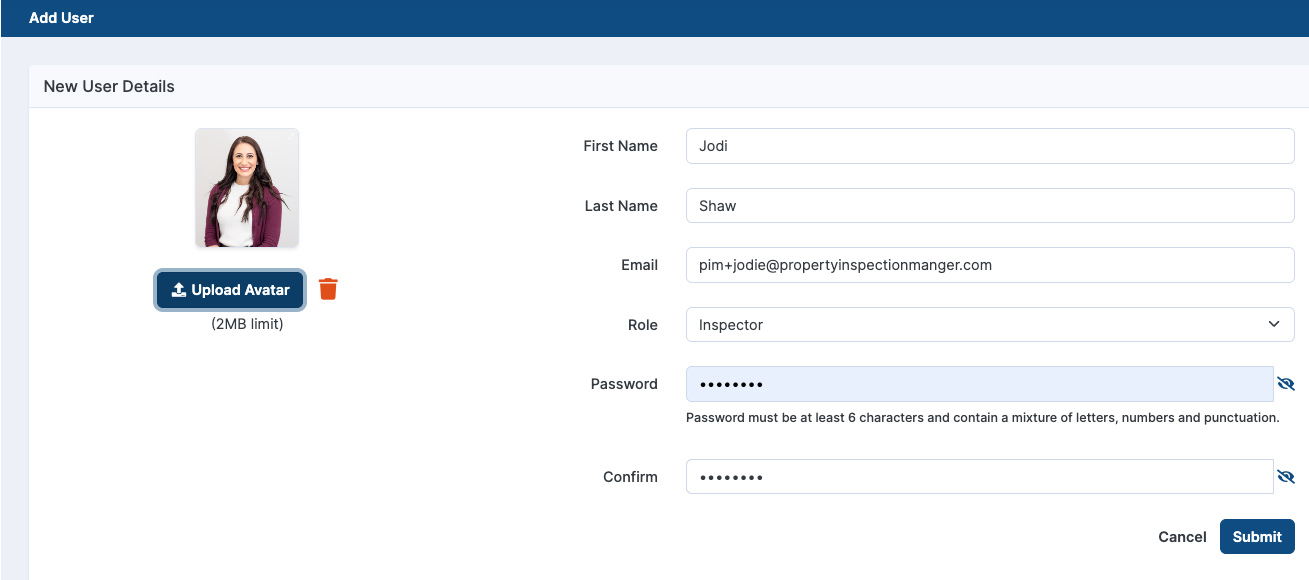
| 2 | Fill in the user's details and tap Submit.
 |
Sending a welcome email
After creating an account you can send the new user a welcome email in one step. The email includes their login details and everything they need to get started — handy getting started videos, help guides, report template selection, integration setup instructions, and how to sync inspections from the PIM Cloud Dashboard (including inspections saved by other users in their organisation).
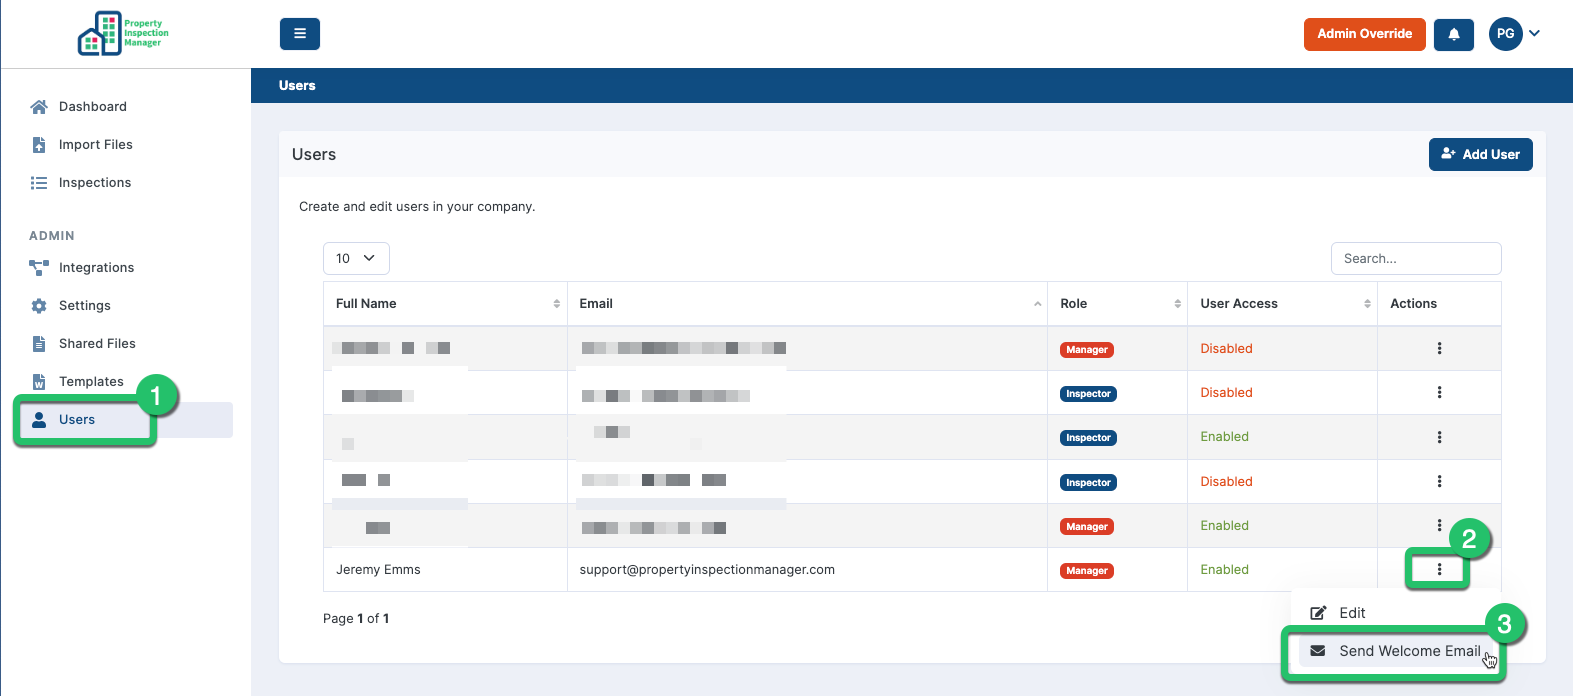
| 1 | Go to the Users tab. |
| 2 | Tap the Actions menu (···) next to the user. |
| 3 | Select Send Welcome Email. |
| 4 | A preview of the welcome email appears. Enter the user's password where indicated, edit any text if needed, then tap Submit to send. |
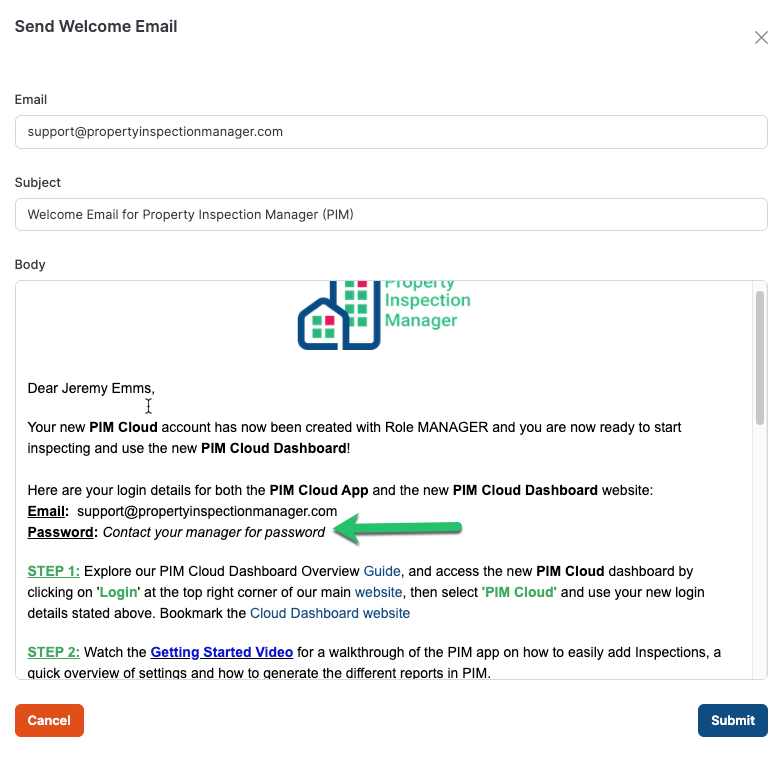
Note: PIM does not store the password. You must enter it manually in this step. The new user can update their password after first login via User Details in the Dashboard. |
If you need any help, please contact PIM Support and we’ll be glad to assist.
Was this article helpful?
That’s Great!
Thank you for your feedback
Sorry! We couldn't be helpful
Thank you for your feedback
Feedback sent
We appreciate your effort and will try to fix the article