The Inspections screen in the PIM Cloud Dashboard gives you a complete view of inspections across your team — search and filter by date, type, status, inspector or address, then edit, view reports, browse photos or export a summary. Log in at app.propertyinspectionmanager.com and click Inspections from the left-hand menu.
Note: Managers can view and edit inspections for all inspectors. Inspectors can view and sync their own inspections only. See Managing User Accounts for role details. |
Contents
- Filtering and searching
- Inspection status reference
- Results list columns
- Inspection actions
- Exporting a summary
Filtering and searching
From the Dashboard, click Inspections in the left-hand menu to open the Inspections screen.
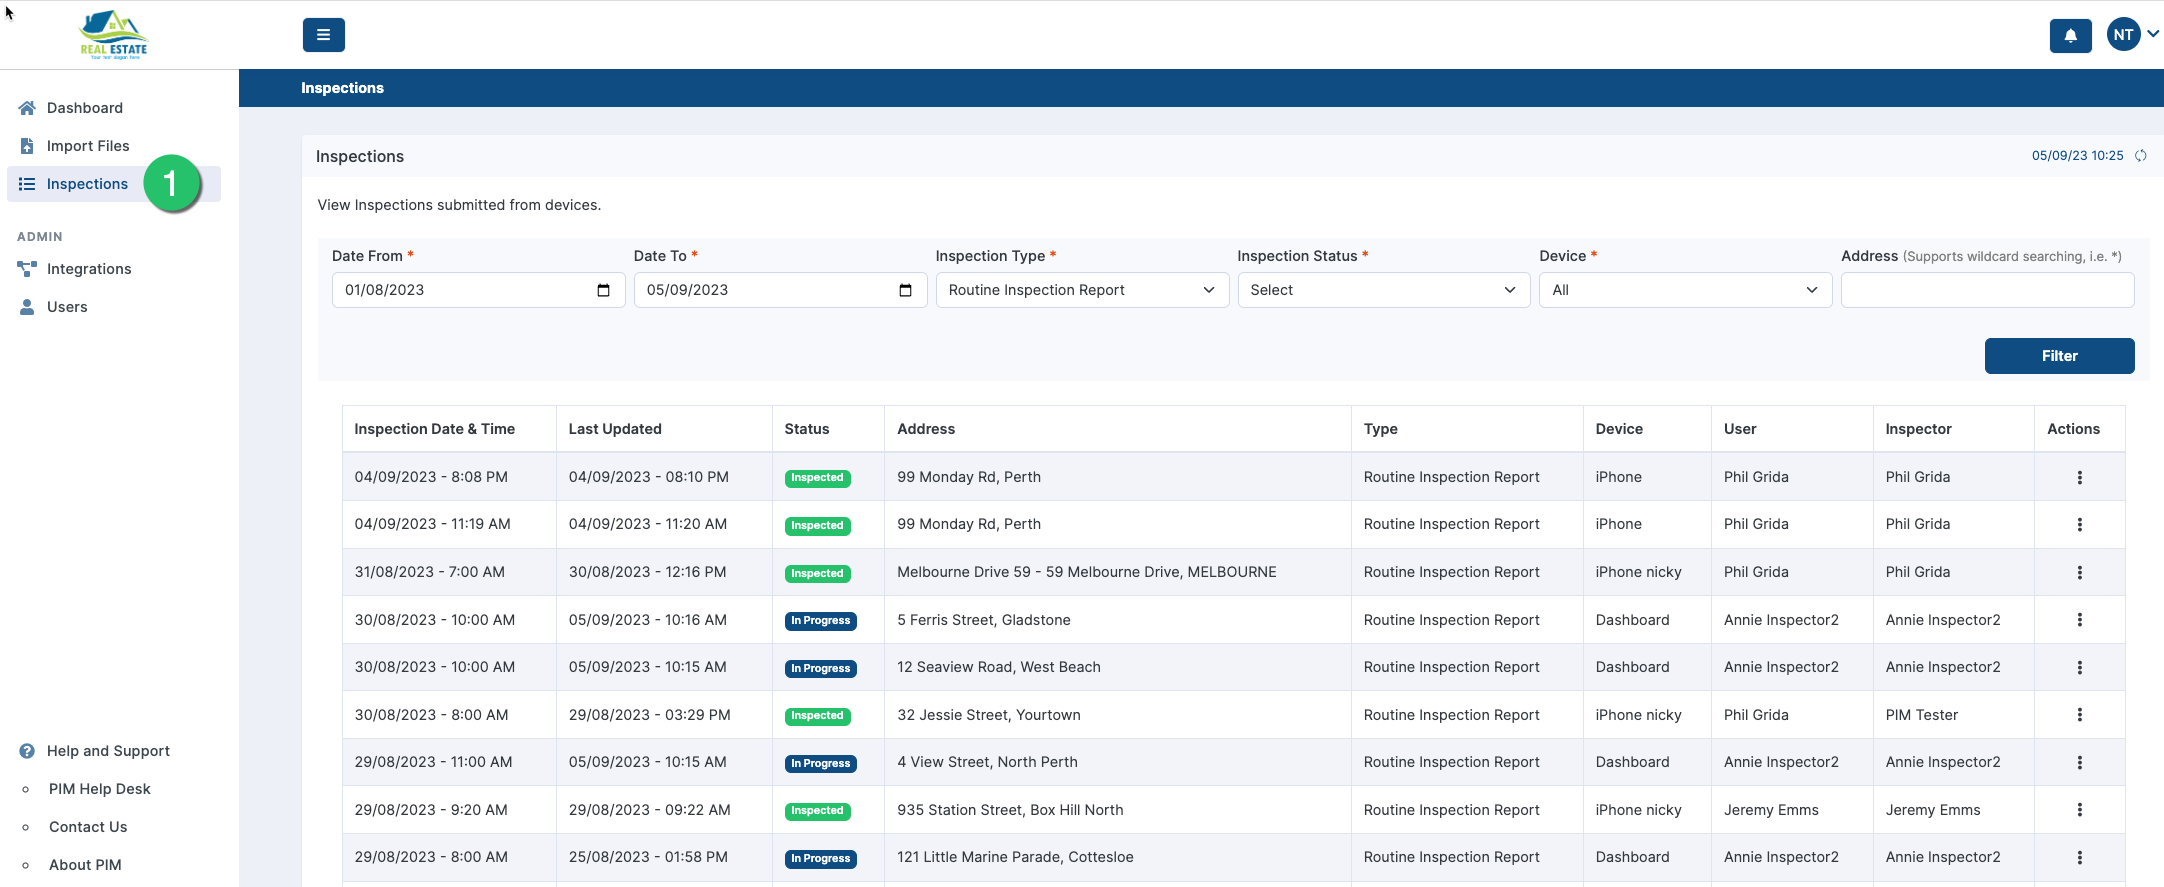
Use the filter bar at the top to narrow your results, then click Filter to apply. The labelled fields below correspond to:
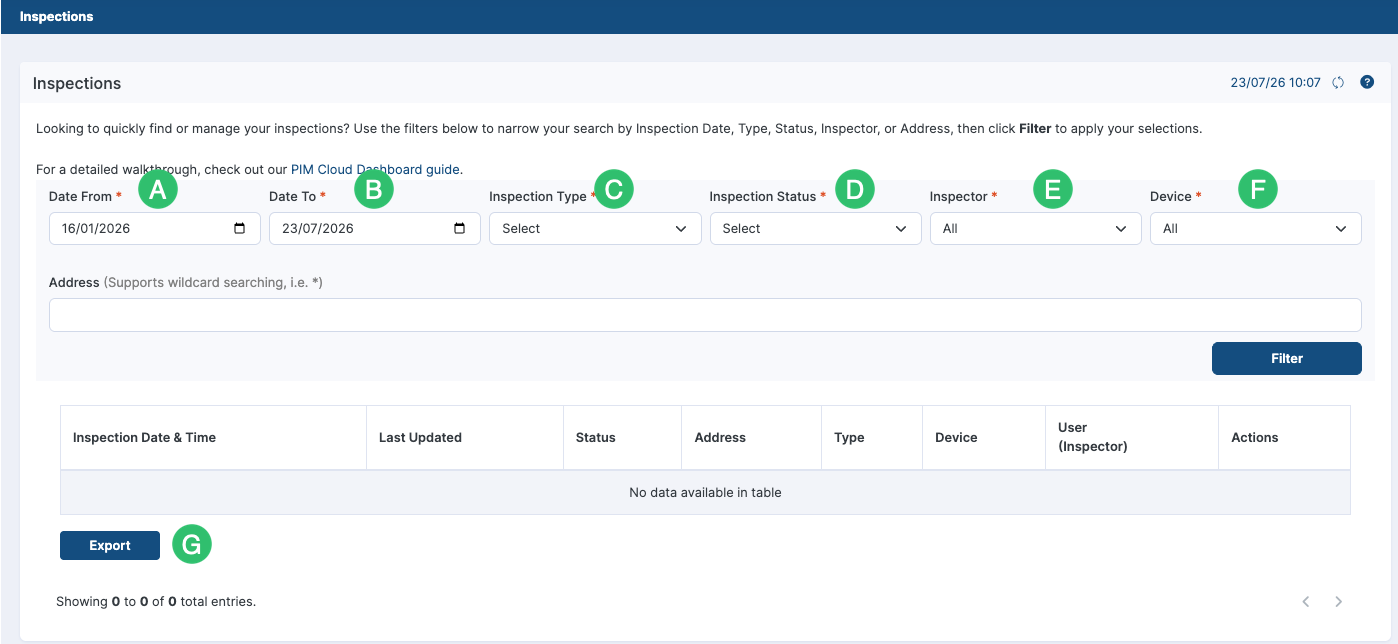
| Filter | What it does |
|---|---|
| A & B — Date From / Date To | Search for inspections created between two dates. |
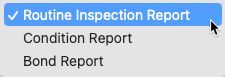
| C — Inspection Type | Filter by Routine Inspection Report, Condition Report, or Bond Report. |
| D — Inspection Status | Filter by the inspection’s current stage — see the status reference below. |
| E — Inspector | Filter to inspections assigned to a specific inspector. |
| F — Device | Filter by the device the inspection was saved from. |
| Address | Type the property address. Use * as a wildcard — e.g. *fre finds all inspections in Fremantle. |
C: Inspection Type — the dropdown lets you choose between the three report types:
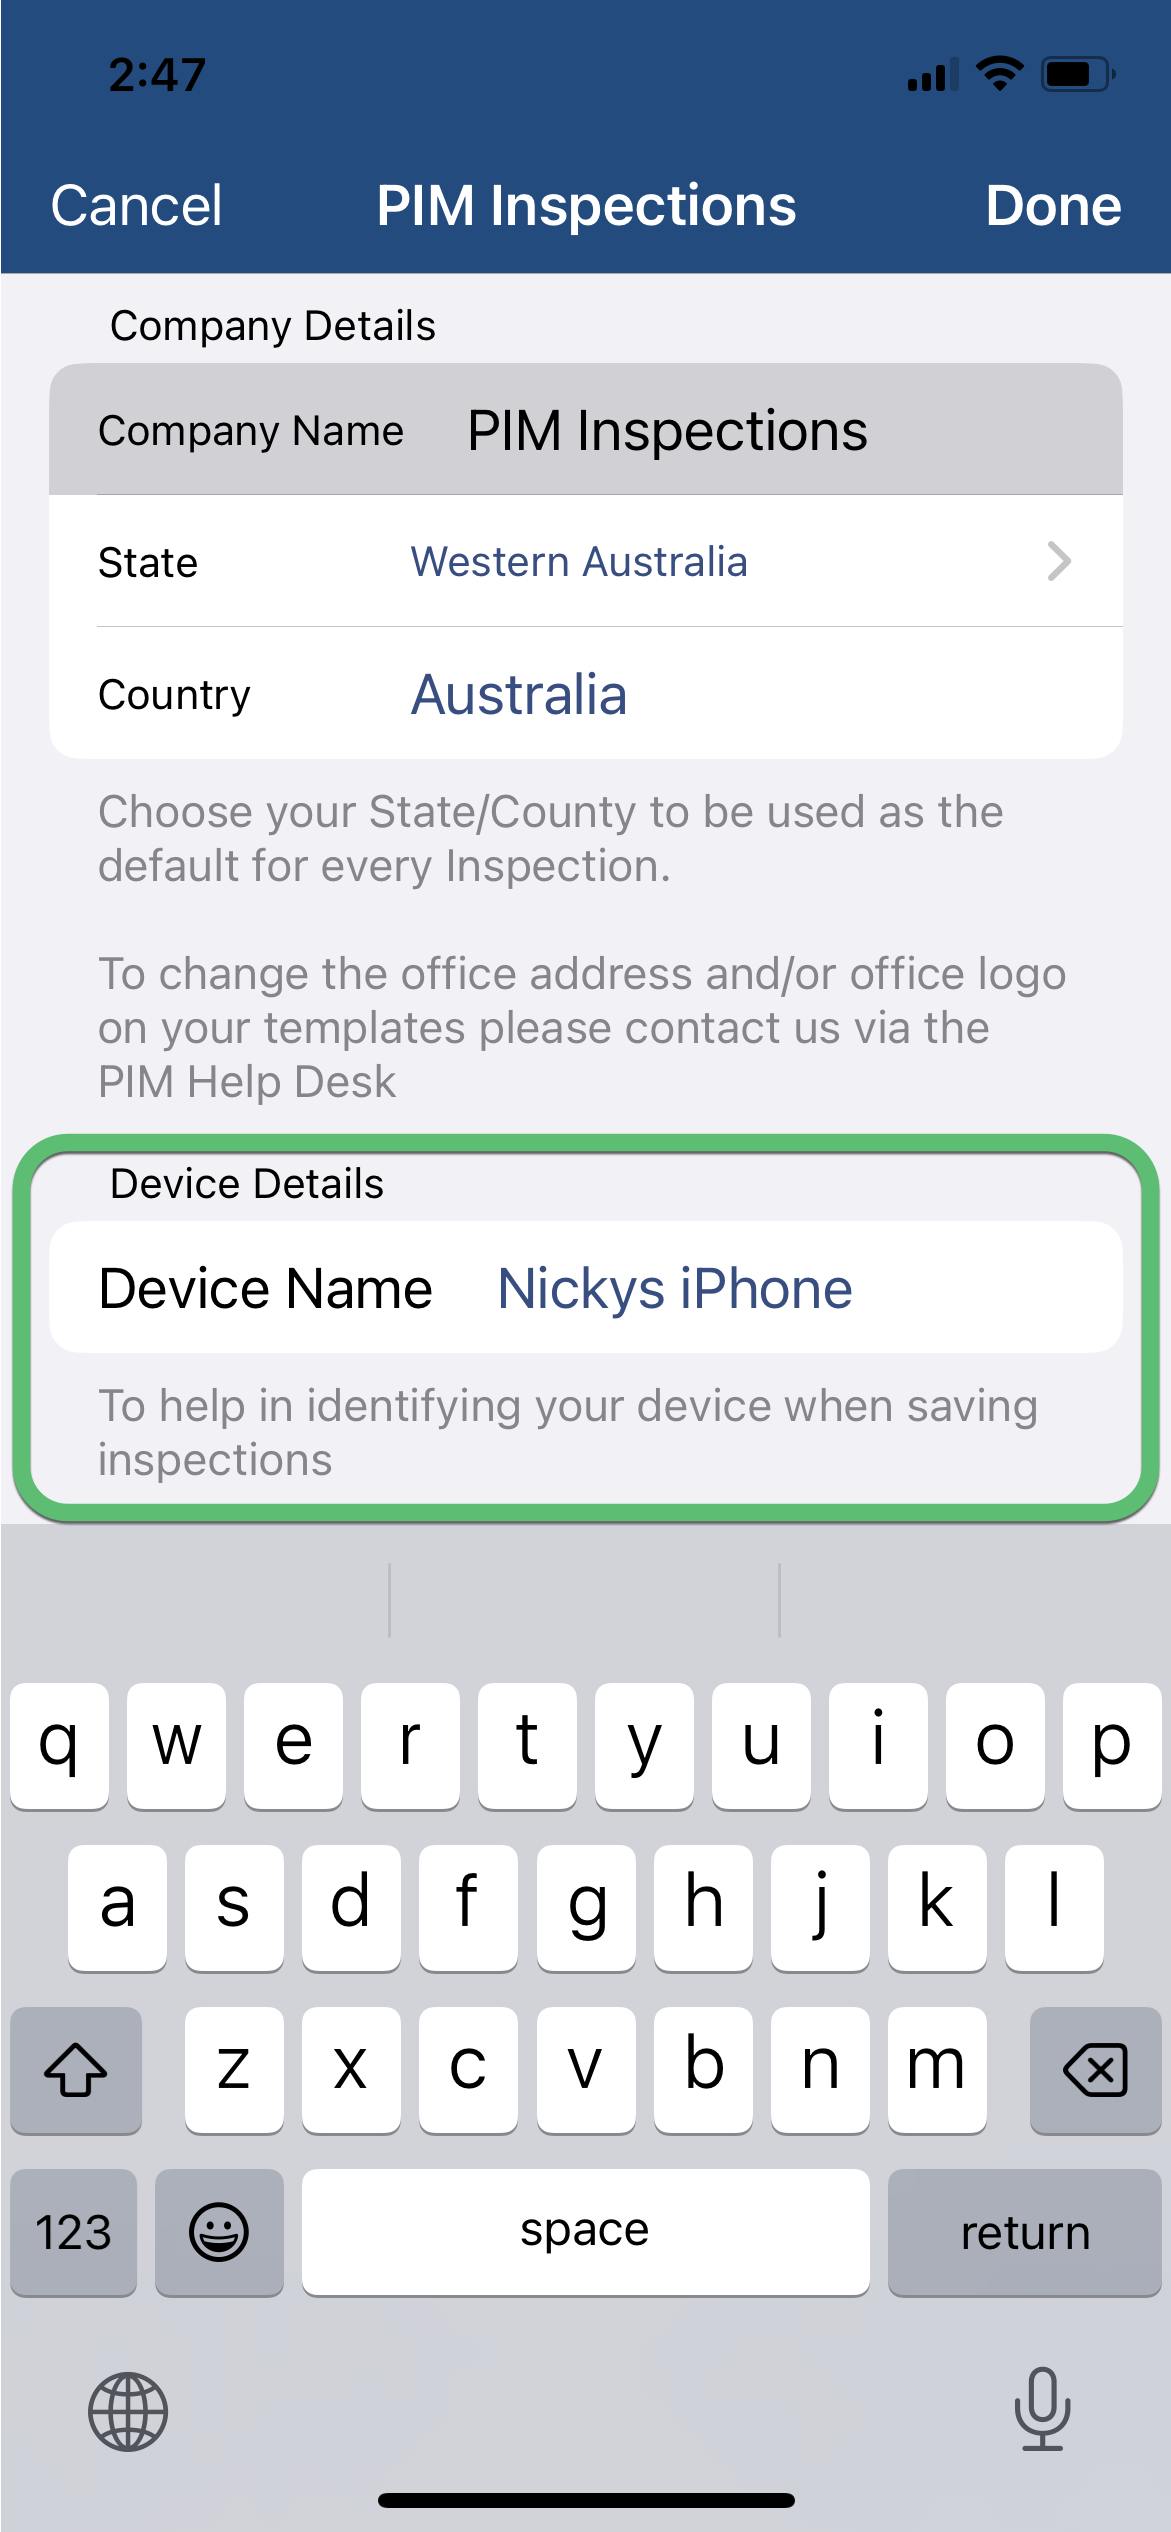
Tip (F: Device): Give each device a recognisable name so the Device filter is meaningful. In the PIM app, go to Settings > PIM Admin > Company and Device Settings > Device Details. |
Inspection status reference
D: Inspection Status — inspections move through several stages depending on how they are handled in the PIM app and Dashboard:
| Status | When it applies |
|---|---|
| Scheduled | Created manually or imported from your PMS — not yet started. |
| In Progress | Saved or previewed in the app, or edited and saved in the Dashboard. Also set when a Tenant or Cleaning/Maintenance report is submitted from the app. |
| Inspected | A Routine or Condition Report has been submitted from the app or Dashboard. |
| Under Review | A property manager has sent an Aided Inspection from a device. |
| Completed | The tenant has completed and returned the inspection to the property manager. |
| Archived | Moved to archived storage. Can be retrieved at any time. |
Results list columns
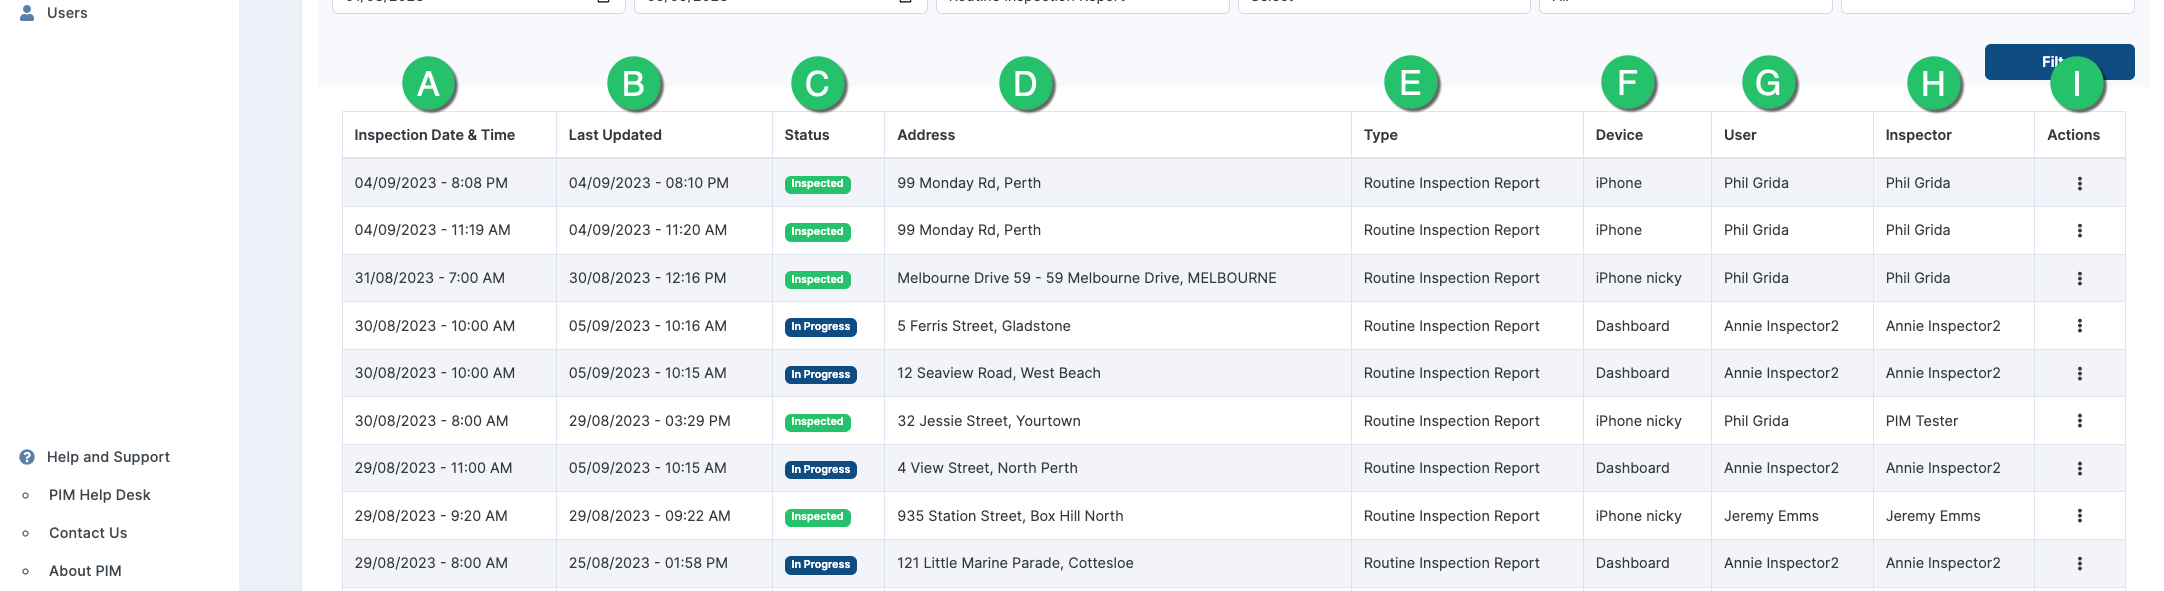
Based on your filter, a list of inspections is displayed. The labelled columns below correspond to:
| Column | Description |
|---|---|
| A — Inspection Date & Time | When the inspection was created. |
| B — Last Updated | Date of the most recent change made to the inspection. |
| C — Status | The inspection’s current stage. See the status reference above. |
| D — Address | The property address. |
| E — Type | Routine, Condition Report, or Bond Report. |
| F — Device | The device the inspection was saved or submitted from. |
| G — User | The account the inspection was saved or submitted from. |
| H — Inspector | The inspector assigned to the inspection. |
| I — Actions | Edit, view reports, browse the photo gallery, or download media. |
Inspection actions
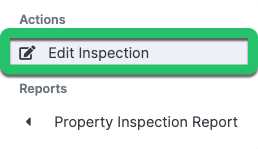
I: Actions — click the Actions menu (the three dots) on any row to open the following options:
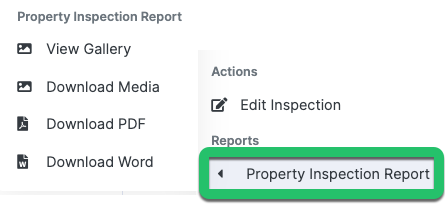
Under Reports, you can also view or download the report and its media:
| Option | What it does |
|---|---|
| Edit Inspection | Open and edit the inspection in your browser — add notes, update details, or attach photos. |
| View Gallery | Browse all inspection photos in a full-screen slideshow gallery. |
| Download Media | Download all inspection photos as a ZIP file. |
| Download PDF | Download the inspection report as a PDF. |
| Download Word | Download the inspection report as an editable Word document. |
Exporting a summary
The Inspections screen lets you export a summary of your filtered results as an Excel (.xlsx) file.
| 1 | Set your filters and click Filter to load the inspections you want to export. |
| 2 | Click the Export button beneath the results table (marked G above). |
| 3 | In the popup, tick the columns to include: Date & Time, Status, Address, Type, Device, Inspector. |
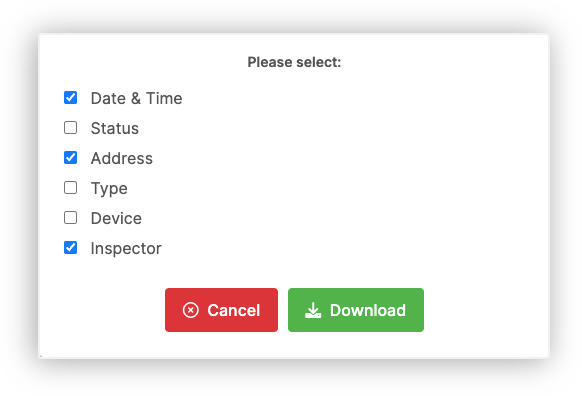
| 4 | Click Download. An Excel file is generated ready to open, share or use for reporting. |
Tip: The export only includes inspections matching your current filter — apply your filters before clicking Export so you get exactly the data you need. |
Looking for an automated summary? You can have a CSV summary of inspections emailed to a manager automatically each month. See Managing the Monthly Inspection Schedule. |
If you need any help, please contact PIM Support and we’ll be glad to assist.
Was this article helpful?
That’s Great!
Thank you for your feedback
Sorry! We couldn't be helpful
Thank you for your feedback
Feedback sent
We appreciate your effort and will try to fix the article