Cirrus8 Integration with PIM
The Cirrus8 integration imports scheduled and ad-hoc inspections into PIM, complete with property and tenant details. Work Requests raised in PIM upload directly to CirrusFM, and completed reports are pushed back to Cirrus8 as PDFs. This integration is available for PIM Premium customers.
The inspection type parameters and property templates in Cirrus8 are normally set up as part of your integration. To check your Cirrus8 setup, see First Time Setup in Cirrus8.
In This Article
- Video Instructions
- Scheduling Inspections in Cirrus8
- First Time Set Up in PIM
- Prepare For a Successful Import
- Import Data Into PIM
- Completing the Inspection in PIM
- Sending the Inspection to Cirrus8
- Troubleshooting
Video Instructions
Prefer to watch? The video below walks through the full Cirrus8 integration workflow. More guides are available on the PIM YouTube channel.
Scheduling Inspections in Cirrus8
Inspections can be scheduled against a Lease (for tenanted properties) or against a Property (for vacant or common-area inspections). The template you choose in Cirrus8 must match a Smart Property Profile in PIM, or PIM will fall back to the default profile.
Your property templates in Cirrus8 should already be set up as part of your integration. Each template needs to match a Smart Property Profile in PIM.
Against a Lease
Open the lease in Cirrus8, locate the Lease Inspection section, and schedule using a date and a template that matches your PIM profile.

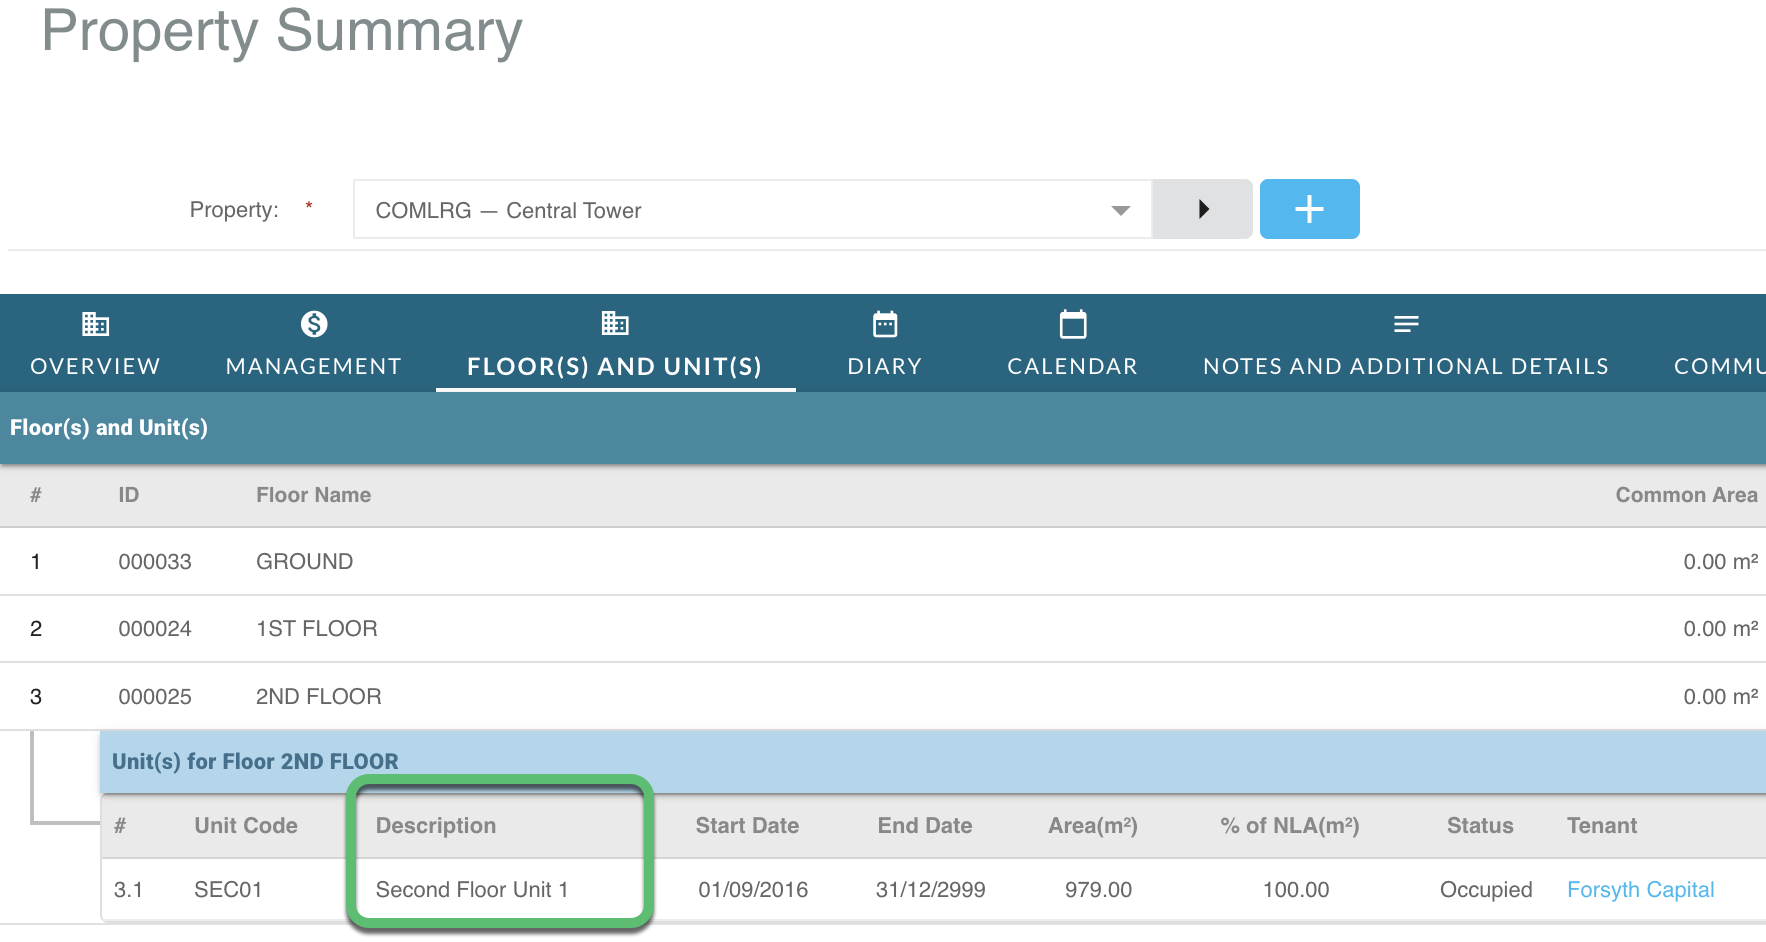
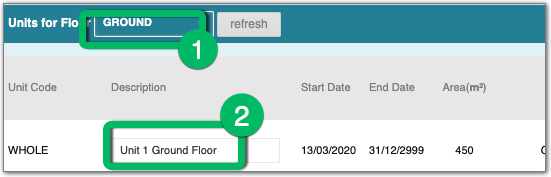
When several tenancies share the same date, give each floor or unit a unique description so PIM can schedule each one separately.
Against a Property
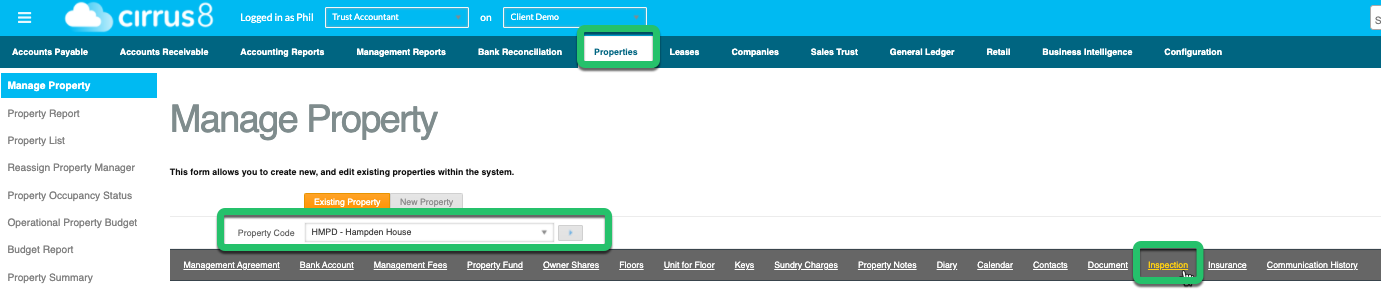
Open Properties, select the property code, go to Inspections, and schedule the inspection. Choose the inspection type so PIM categorises it correctly:
- Routine → Property Inspection
- Condition → Condition
- Entry or Pre-Lease → Entry / Ingoing Condition
- Exit or Post-Lease → Exit / Outgoing Condition
- Checklist or Bond → Bond Report

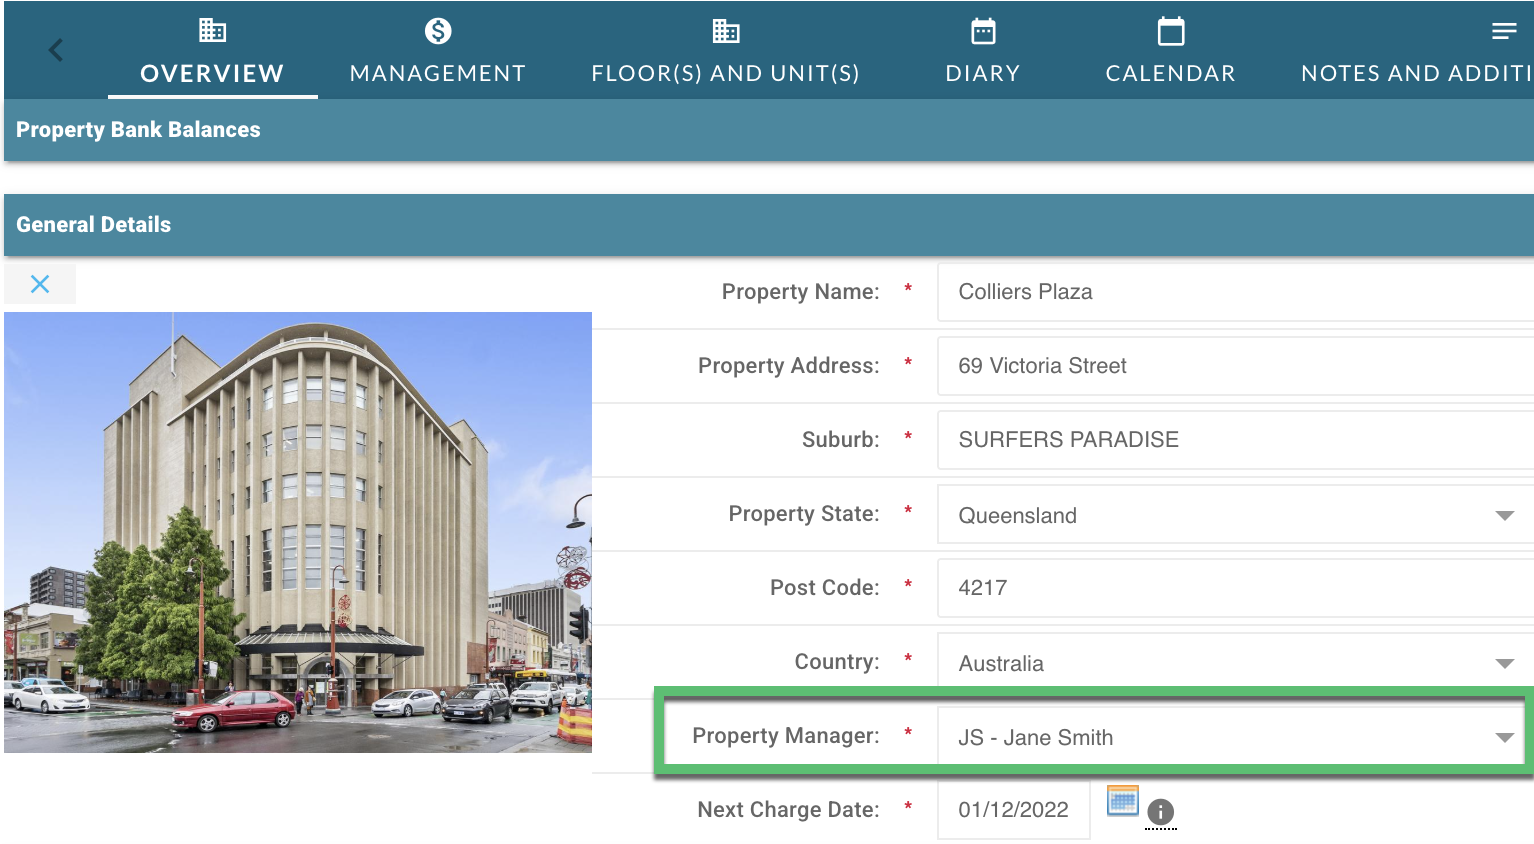
Make sure the Property Manager is set correctly in Cirrus8. PIM uses that manager along with the default inspector and shows both on the import screen. You can update the default inspector in PIM's inspector settings.
First Time Set Up in PIM
1. Confirm Smart Property Profiles
In PIM Admin settings, create your Smart Property Profiles so they match the template names you use in Cirrus8. Send your profiles to PIM Support — they will forward the settings file to Cirrus8. Notify Cirrus8 if you make changes later.

2. Enable the Cirrus8 Integration
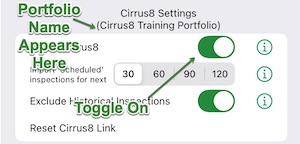
Ask PIM Support to link your Cirrus8 API key. Then open Advanced > Integrations in PIM settings and turn on Cirrus8. Make sure Exclude Historical Inspections is also turned on, so only upcoming inspections appear in the import list.
3. Quick Check Labels (optional)
In PIM Admin, select your Routine or PCR inspection type and turn on the setting that ticks quick check labels by default. This saves time during the inspection.

Prepare For a Successful Import
1. Confirm Inspectors
PIM assigns a default inspector when importing. Review and update your inspector list in PIM Admin so inspections land with the right person.

2. Set a Default Inspection Type
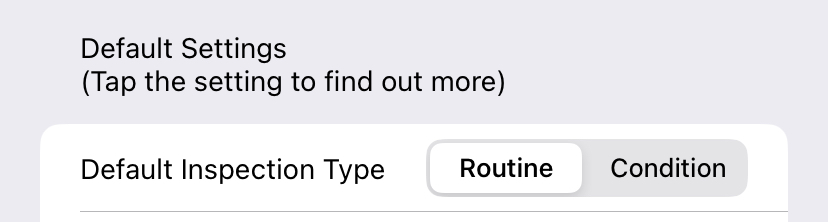
PIM applies your default inspection type during import. Set it in PIM Admin before running your first import.
Import Data Into PIM
| 1 | Open the Import tab in the PIM app |
| 2 | Pull down to refresh, then open the latest file from Cirrus8. |

| 3 | Review the list. Green marks a new property; orange marks an existing property (repeat inspection). |

| 4 | Use Filter (1) or Sort (2) if the list is long. |

| 5 | Tap Action (1) and choose an import option. To import only selected properties, cancel, select them individually, then choose Import Selected. |

| 6 | Confirm the import type. PIM uses your default profile and inspection types. Tap Continue if it looks correct. |

| 7 | Note the confirmation message, then close it. |

Completing the Inspection in PIM
Imported inspections appear under the Inspections tab. Complete the inspection as usual, then tap Submit Report. The report uploads to Cirrus8 automatically as a PDF, and the Cirrus8 status changes to Completed or Closed.
Once submitted, you cannot submit the report again from this screen. For changes, see Troubleshooting.
In Cirrus8 you can tick Publish to Owner or Publish to Tenant to share the report through the Owner or Tenant Portal. If these options are missing, contact Cirrus8 support to have them enabled.

Sending the Inspection to Cirrus8
Use this if you only previewed the inspection or need to resend it. If you already tapped Submit Report, the report was emailed and uploaded automatically.
| 1 | Open the inspection's Reports Folder. |

| 2 | Tap Options and choose Send to Cirrus8. |

Troubleshooting
Re-submitting a Completed Inspection
In Cirrus8, open the completed inspection and tap Edit (if available), then mark it Incomplete. This removes the PDF and returns it to Upcoming Inspections. Resubmit from PIM once it appears there again.

Sharing With Owners and Tenants
Tick the checkbox on the uploaded document in Cirrus8 to share it through the Owner or Tenant Portal. Cirrus8 must activate these portals before they are available.

Inspections Not Uploading Automatically
Automatic upload only applies to inspections imported from Cirrus8. For inspections created directly in PIM, use the manual report upload guide.
Units at the Same Address
Cirrus8 uses a Unit Code and Unit Description. PIM combines these with the property street to form the full address. Select the floor and type the unit number in the description. Only add a unit number when multiple units share an address — do not put the full address in the description or PIM will create a duplicate.

For Cirrus8 workflow or upload questions, contact support@cirrus8.com.au or call +61 1300 668 594. For PIM questions, contact support@propertyinspectionmanager.com.
Was this article helpful?
That’s Great!
Thank you for your feedback
Sorry! We couldn't be helpful
Thank you for your feedback
Feedback sent
We appreciate your effort and will try to fix the article