MRI Property Tree Integration

Modified on Mon, 12 Oct at 11:57 AM

Property Inspection Manager logoMRI Property Tree logo

Using PIM With MRI Property Tree

Thanks to our integration with MRI Property Tree, you can import confirmed inspections directly into PIM, complete with relevant property information and tenant details.

Once you have completed your inspections in PIM, the reports are automatically pushed into MRI Property Tree ready for you to complete your follow up activities.

The latest PIM now offers deeper integration and better communication capabilities for MRI Property Tree users. You can create and submit customised reports for tenants and landlords plus directly populate Owner Notes, Follow-Up Items, Tenant Notes, and Action Notes into MRI Property Tree. This streamlined process saves time, eliminates duplication, and simplifies your workflow!

Raise maintenance requests on site. With the MRI Property Tree integration, you can also raise a maintenance request directly from PIM while you are on site, with inspection photos attached. The request appears in MRI Property Tree straight away. See the MRI Property Tree Maintenance Requests guide for how it works.

Connecting for the first time? Follow the MRI Property Tree Integration | How to Set Up guide first to generate your API key and activate PIM in MRI Property Tree.

Contents

Video Instructions

Prefer videos over written instructions? No problem! Watch the video version below or visit our PIM YouTube Channel.

First Time Set Up

The ability to import from MRI Property Tree relies on information in PIM Settings so it is important to know how yours is set up. You only have to do this once.
1Check the MRI Property Tree API has been linked to your account
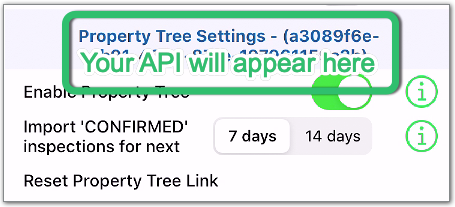
Your MRI Property Tree API key must be linked with PIM to enable the integration. If you do not see your API key in the field above the toggle, follow the MRI Property Tree Integration | How to Set Up guide to generate your key and provide it to PIM.
2Enable Property Tree integration
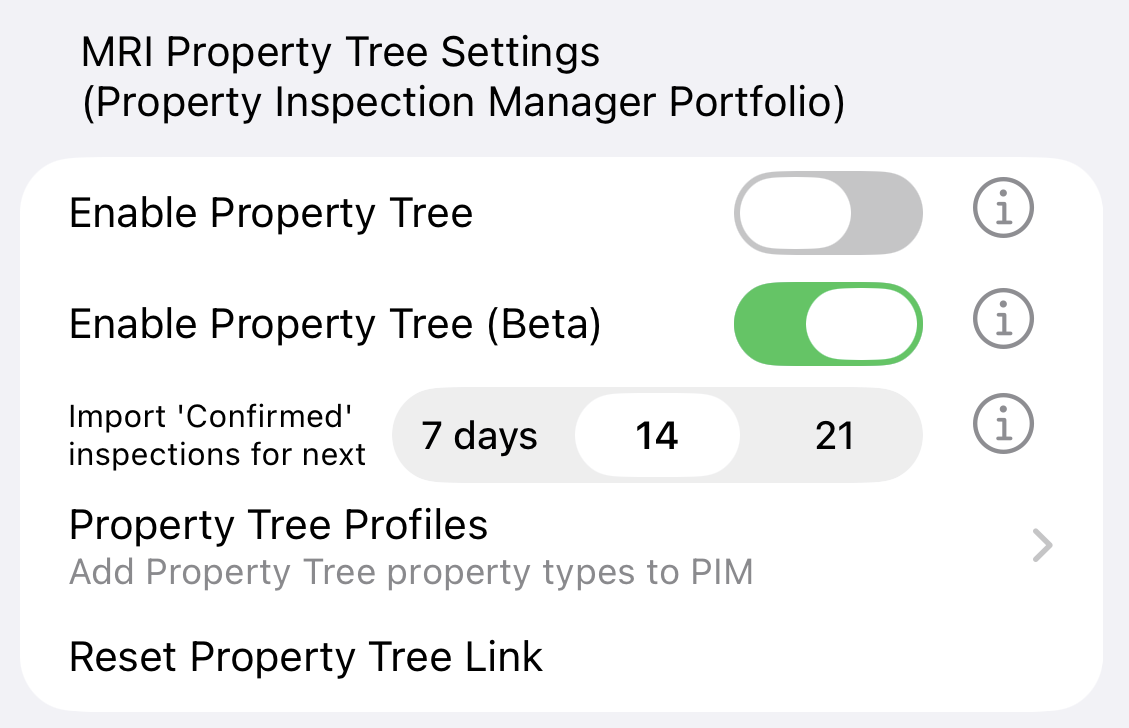
Go to Settings > Advanced, Integrations & About the App > Enable Property Tree.
3Auto-populate your MRI Property Tree profiles
PIM can automatically set up your MRI Property Tree profiles based on whether your device is set up for residential or commercial property management, so your imported inspections always load with the correct layout. In the PIM app, go to Settings > Advanced, Integrations & About the App, tap Property Tree Profiles, untick any profiles that are not relevant to you, then tap Add.

See Review your MRI Property Tree profiles in the set up guide for screenshots of the Residential and Commercial profile lists.
4Turn on Quick Check Labels (optional)
Another time-saving feature is to have the quick check labels always ticked by default. To set this default, go to Settings > PIM Admin > Routine or PCR inspections and toggle Quick Check Always Ticked to the On position. See the Customised Settings Guide for more information.

Prepare For a Successful Import

A few extra tweaks in PIM Settings to ensure exact matches with MRI Property Tree fields will ensure a more successful import.

If you are unsure how to schedule an inspection in MRI Property Tree, these instructions walk you through it.

1Set up Property Profiles (optional)
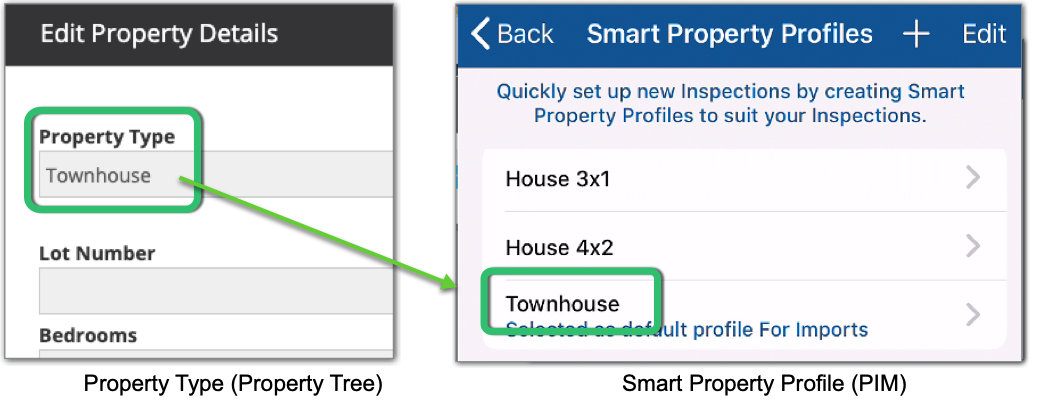
Property Profiles are a way to quickly set up inspections for the most common property types of your portfolio, such as a townhouse or small office. With a little initial set up, your existing MRI Property Tree Property Types can be matched to PIM to allow for a seamless import. This will save a lot of time adding or removing rooms during the inspection.

Your MRI Property Tree profiles can be auto-populated in PIM. To add or edit your own, go to PIM Settings > PIM Admin > Property Profiles. See the Property Profiles Guide for more information.
2Confirm Inspectors and Property Manager
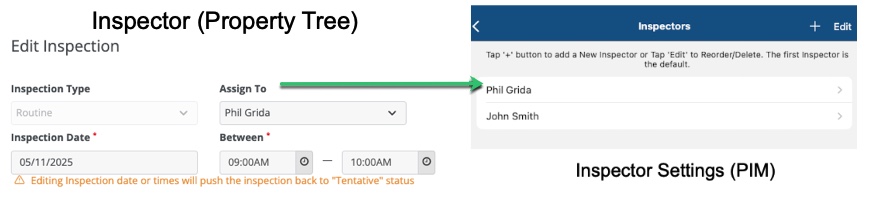
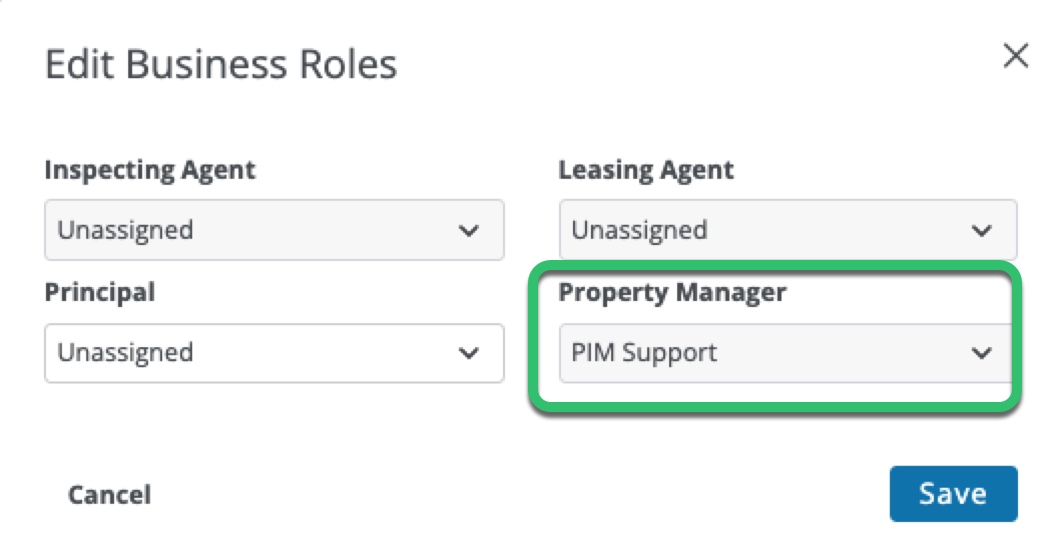
When importing, PIM brings in both the Inspector (Assign To) and Property Manager data for each inspection in separate fields, making it easier to see who is responsible for what. The Property Manager can be set against a Property under Business Roles. The Inspector can be set when setting up the Confirmed Inspection using the Assign To field (see screenshots below).

For the Assign To field, PIM will look for an exact match with an existing Inspector name in PIM. If no match is found, the Default Inspector will be used instead. You can add or edit Inspectors in your PIM settings under PIM Admin > Inspectors and Templates.

If you would like to make the most of this new data, we can also update your reports to display this information for a clearer overview.

3Assign an Inspection Type
MRI Property Tree also allows you to assign an inspection type to your inspections. A Routine will import into PIM as a Property Inspection Report and an Ingoing/Outgoing (sometimes called Entry/Exit) will import as a PCR in PIM.
4Add Inspection Notes and Key Number to import into PIM
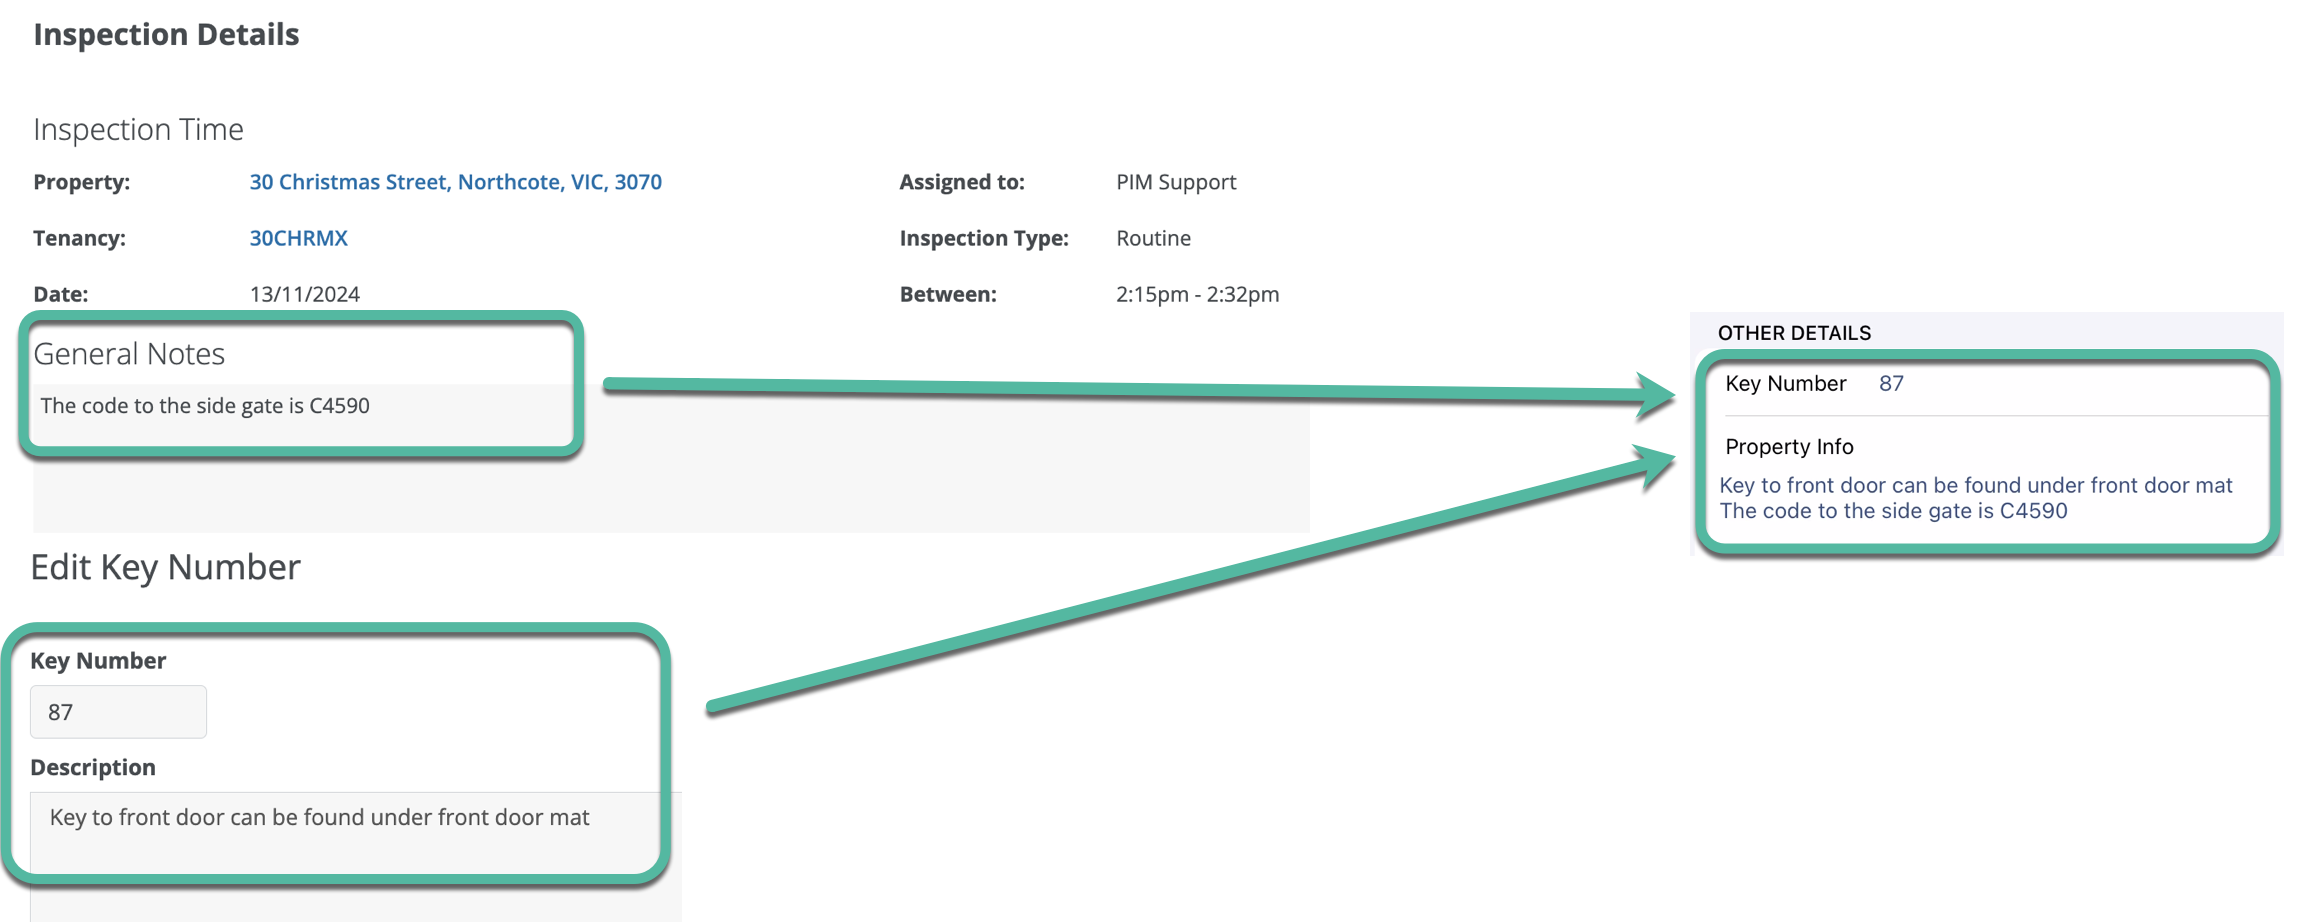
Inspection Notes (General) stored in MRI Property Tree for your scheduled inspection can also be imported into the Property Info field in PIM.

The Key Number and Key Description assigned in MRI Property Tree and stored with your property can also be imported into the Property Info field in PIM.
Import Data Into PIM
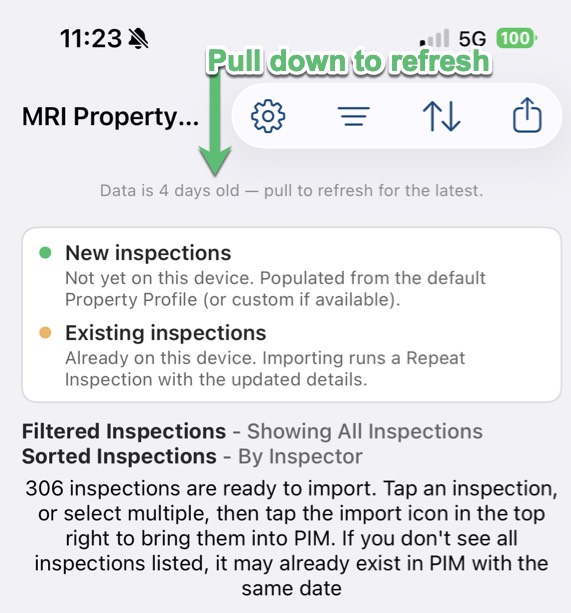
Note: PIM imports real-time data from MRI Property Tree but only for inspections which are marked as Confirmed. Make sure MRI Property Tree is up to date before you start the import process below.
1Navigate to the Import tab

2Import the latest file from MRI Property Tree
Pull down on the screen to refresh the data files. Once the file appears, tap to open.
3View imported inspections
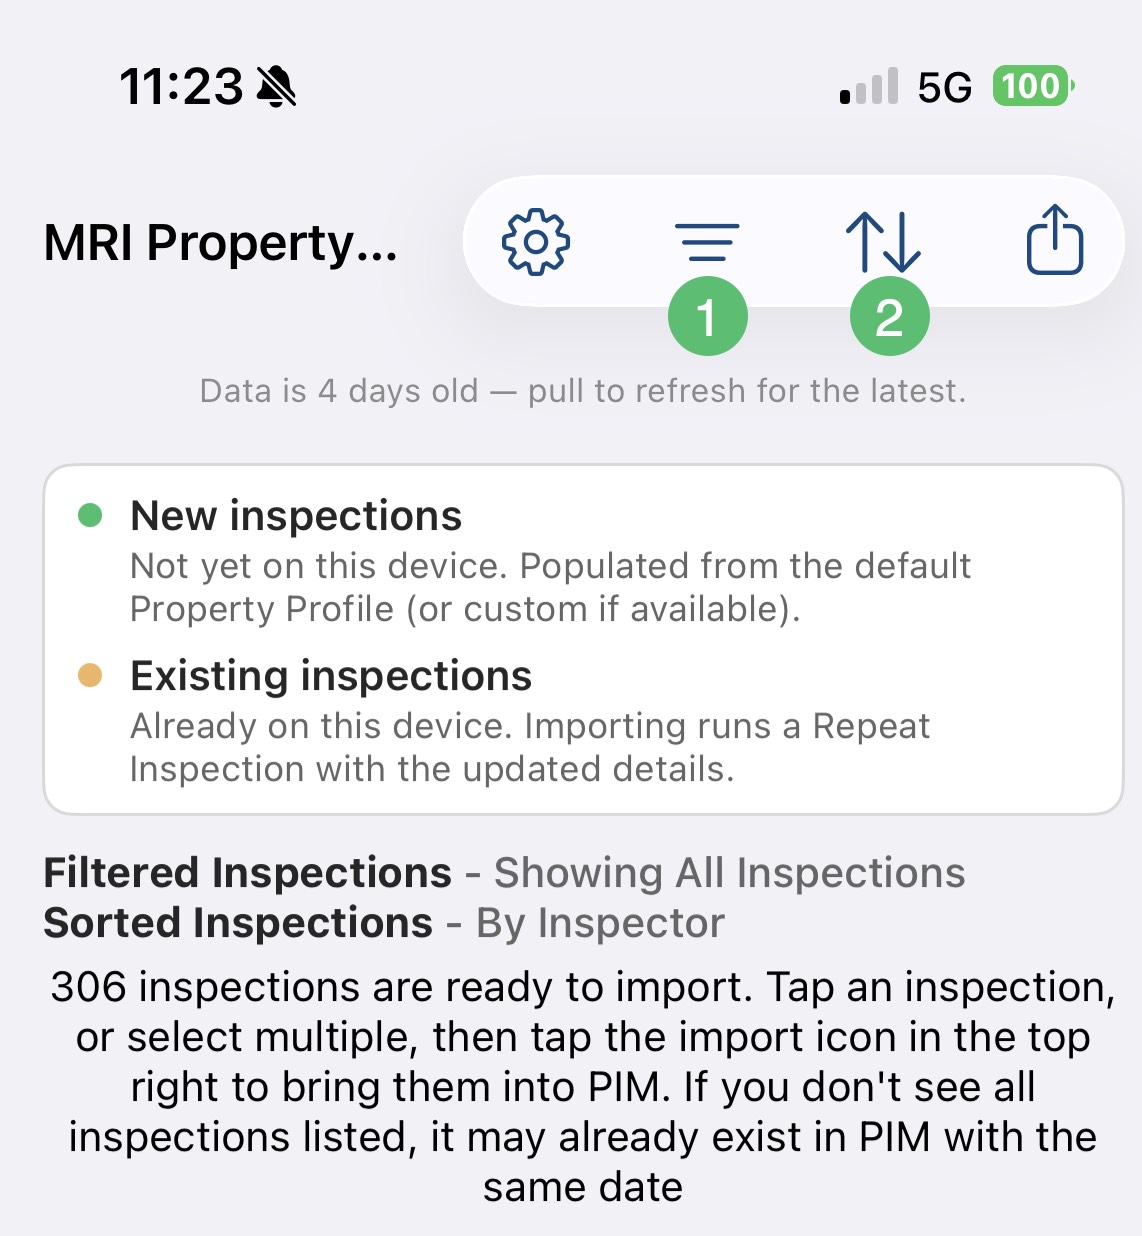
Your properties will be listed with a colour code on the left.
Green indicates a property PIM has not seen before, so it will be treated as a new inspection.
Orange represents an existing property, so a Repeat Inspection will be created.
4Filter and sort if required
If there are a large number of properties in the imported list, use the Filter (1) or Sort (2) options to make things easier to view.
5Import the inspections
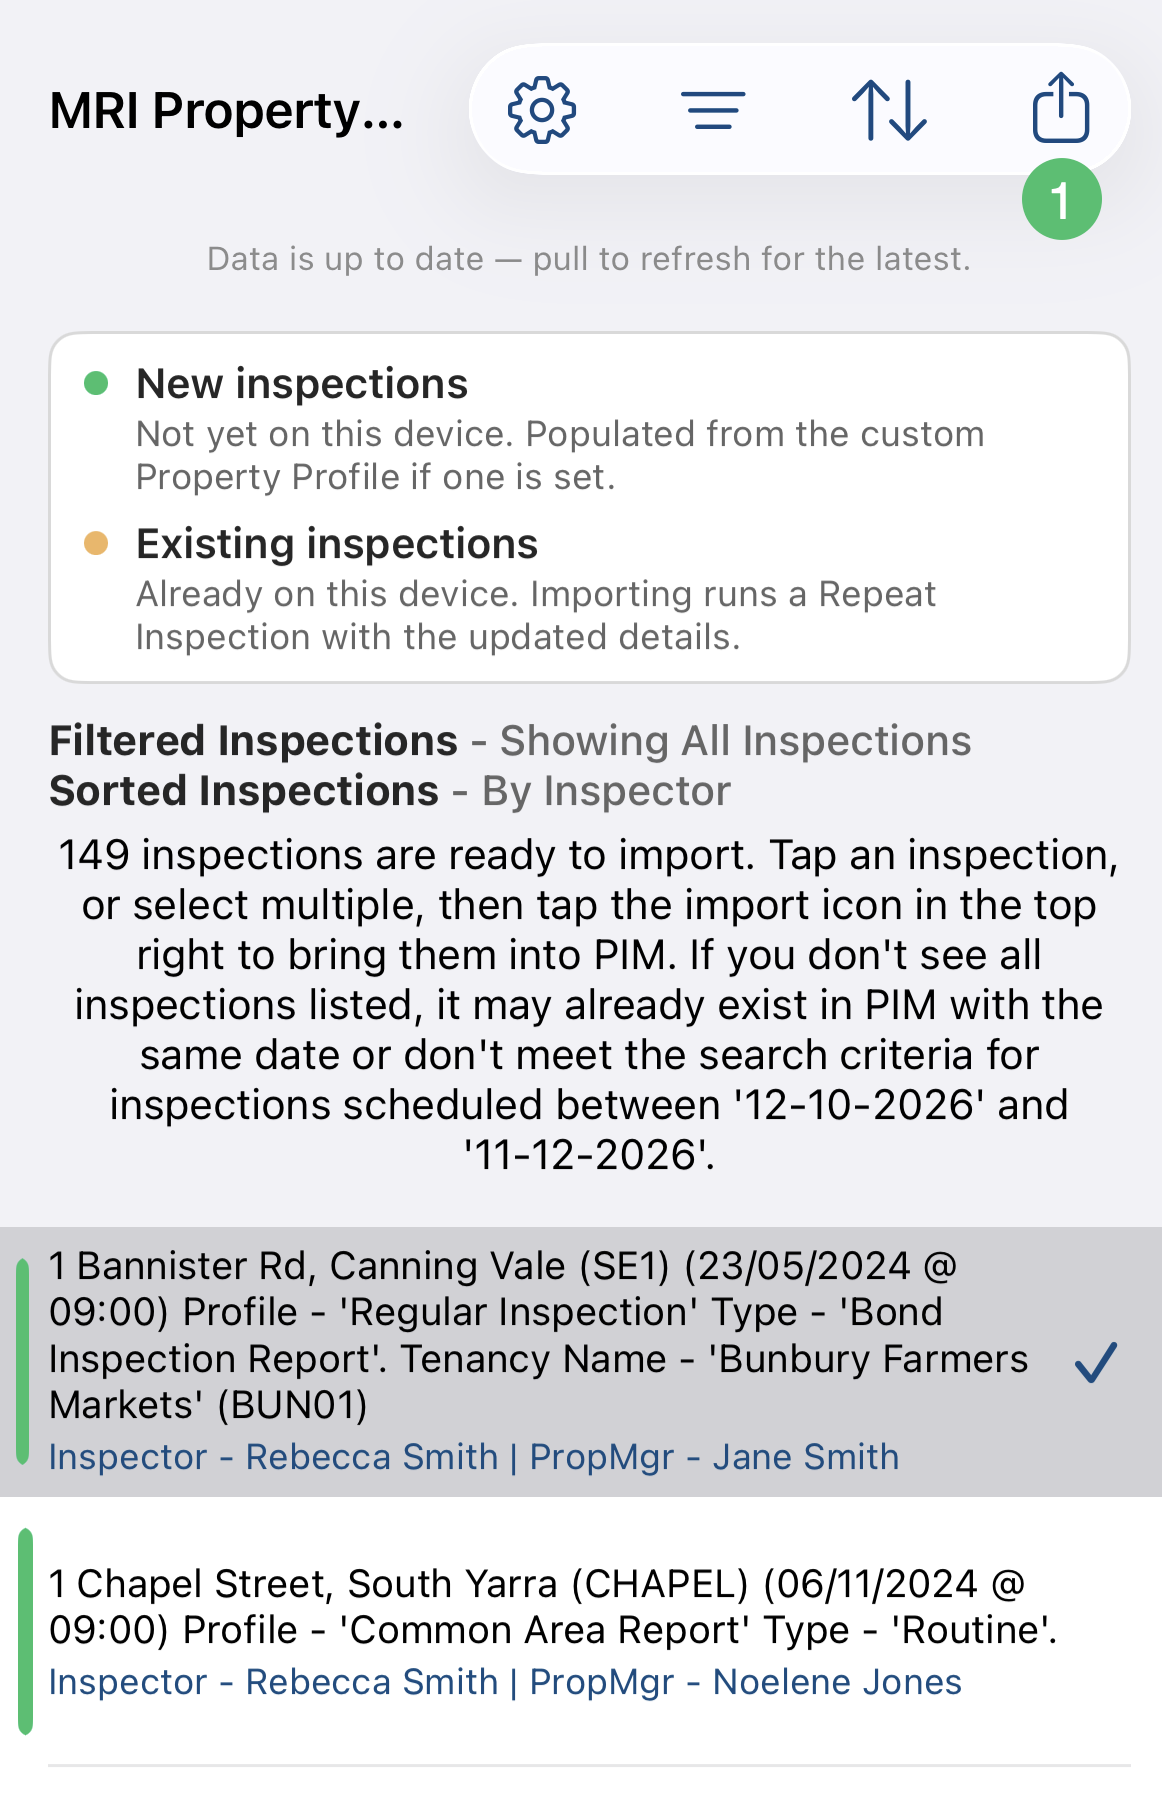
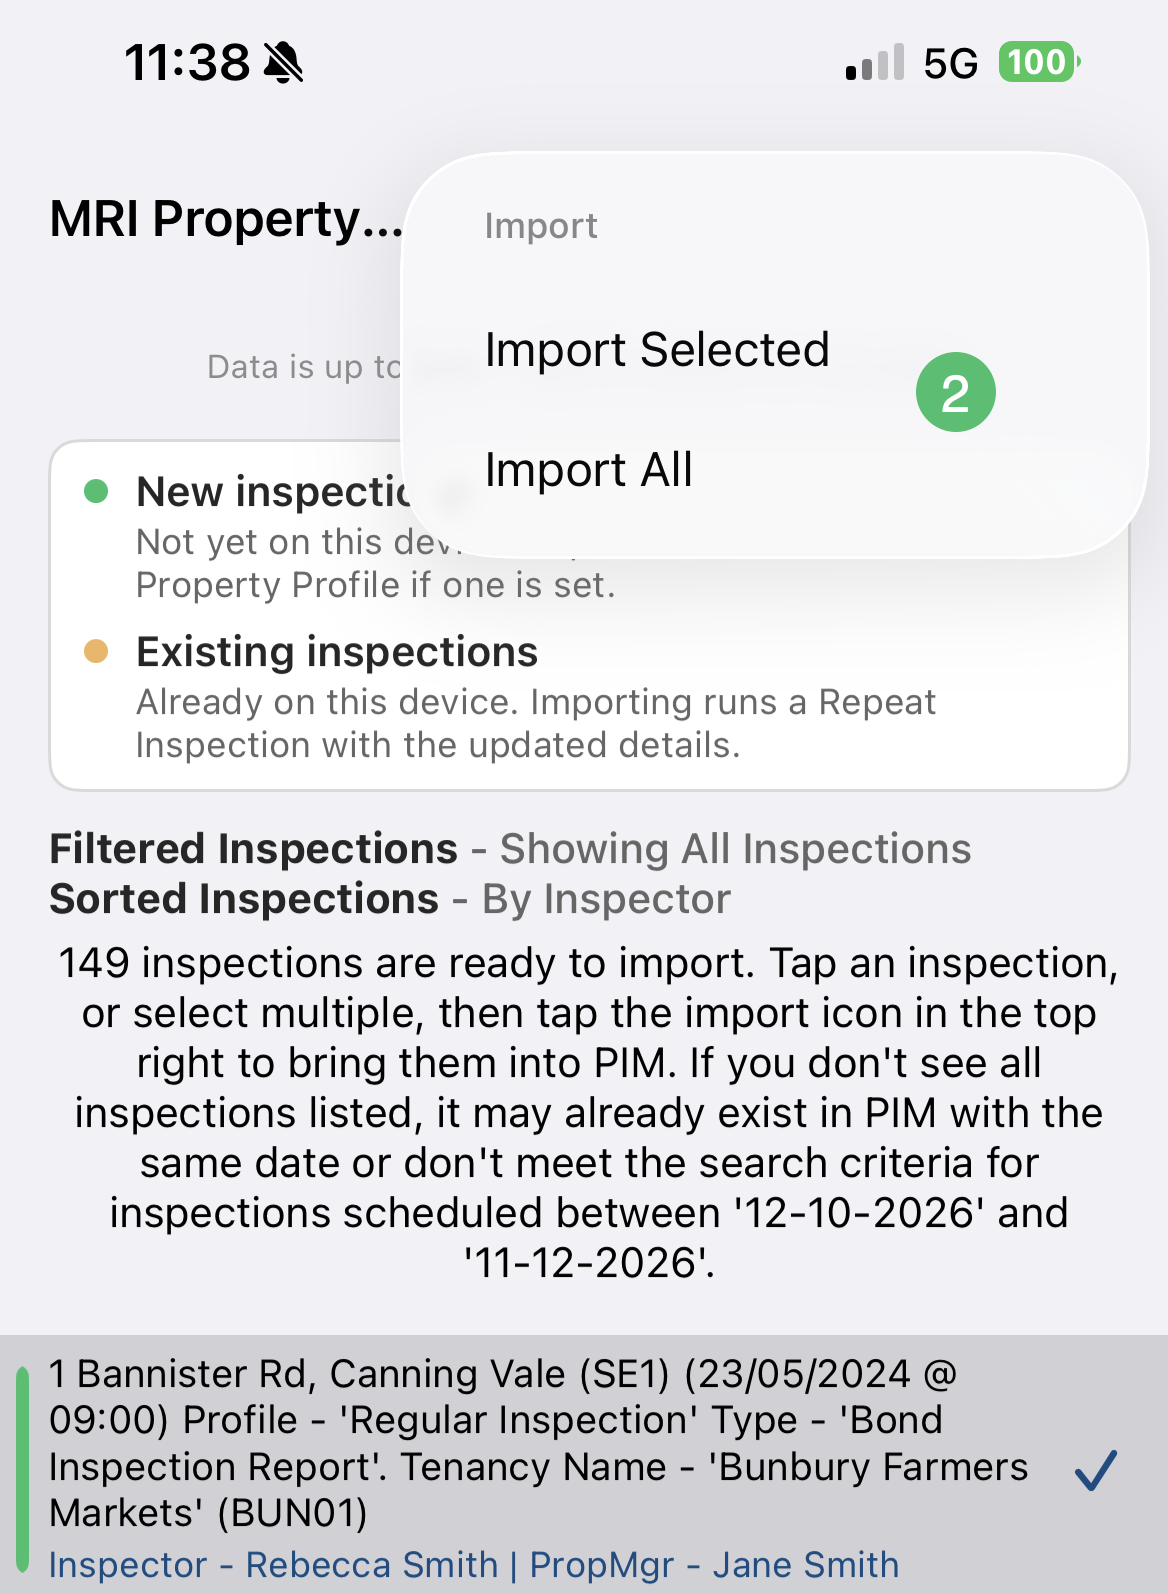
When you are ready to complete the import select an inspection (s), select the Action button (1) then choose one of the Import options (2).
 
Tip: If you only want to import some properties, press Cancel then tap against the properties you want. This places a check on the right. You can then choose Import Selected instead of Import All.
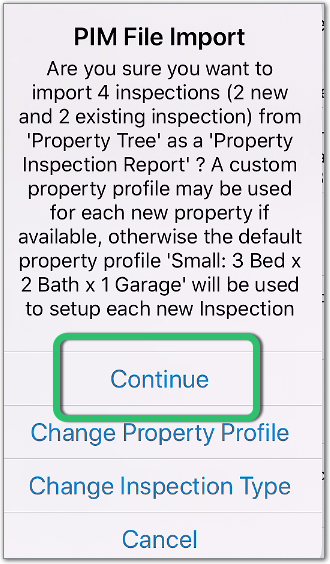
6Confirm the import type
The import will create inspections based on the profile and inspection type set in MRI Property Tree where available, otherwise it will use the PIM default. If you are happy with this, tap Continue.
7Close the PIM File Import message
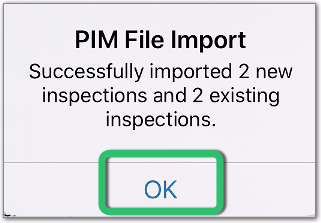
Take note of the confirmation message then tap OK to close.

Complete The Inspection

After importing, your scheduled inspections will be available under the Inspections tab.

Go ahead and complete the inspection in the usual way by adding notes and photos then Submit Inspection when done. This will upload a copy of the report into MRI Property Tree and update the inspection status from "Confirmed" to "Conducted".

Note: The report will not upload if the status is closed or cancelled.

You can locate your report in MRI Property Tree by navigating to the property address, tapping the Inspections tab, then tapping the "eye" symbol on the right next to the inspection and scrolling down to documents. Another way is to select the Documents tab from the property. See below.
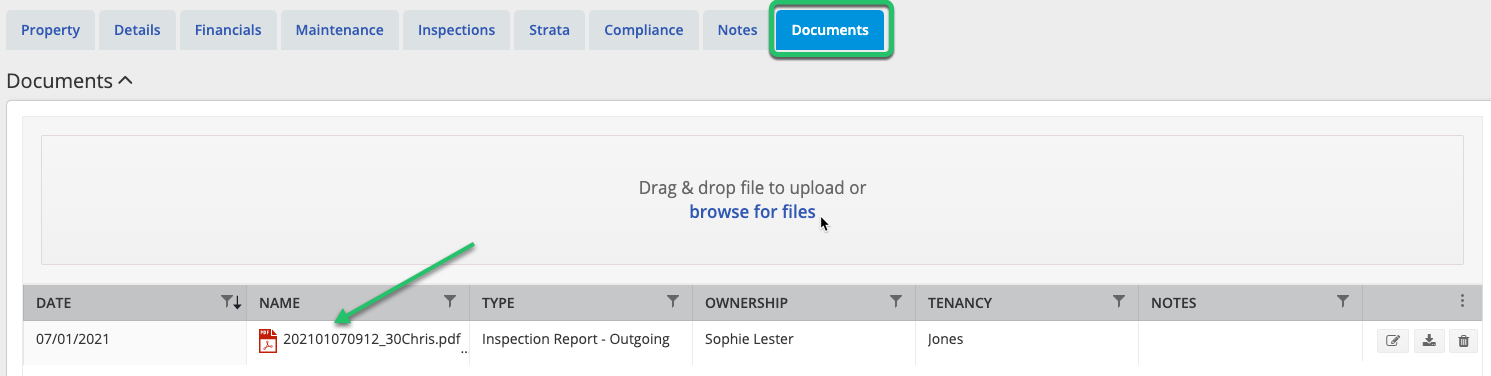
See the full range of Inspection Guides for more information.

Resend Inspection to MRI Property Tree

If for some reason you only previewed the inspection rather than submitted it, or need to re-send to MRI Property Tree, this can easily be done from the home screen of the inspection.

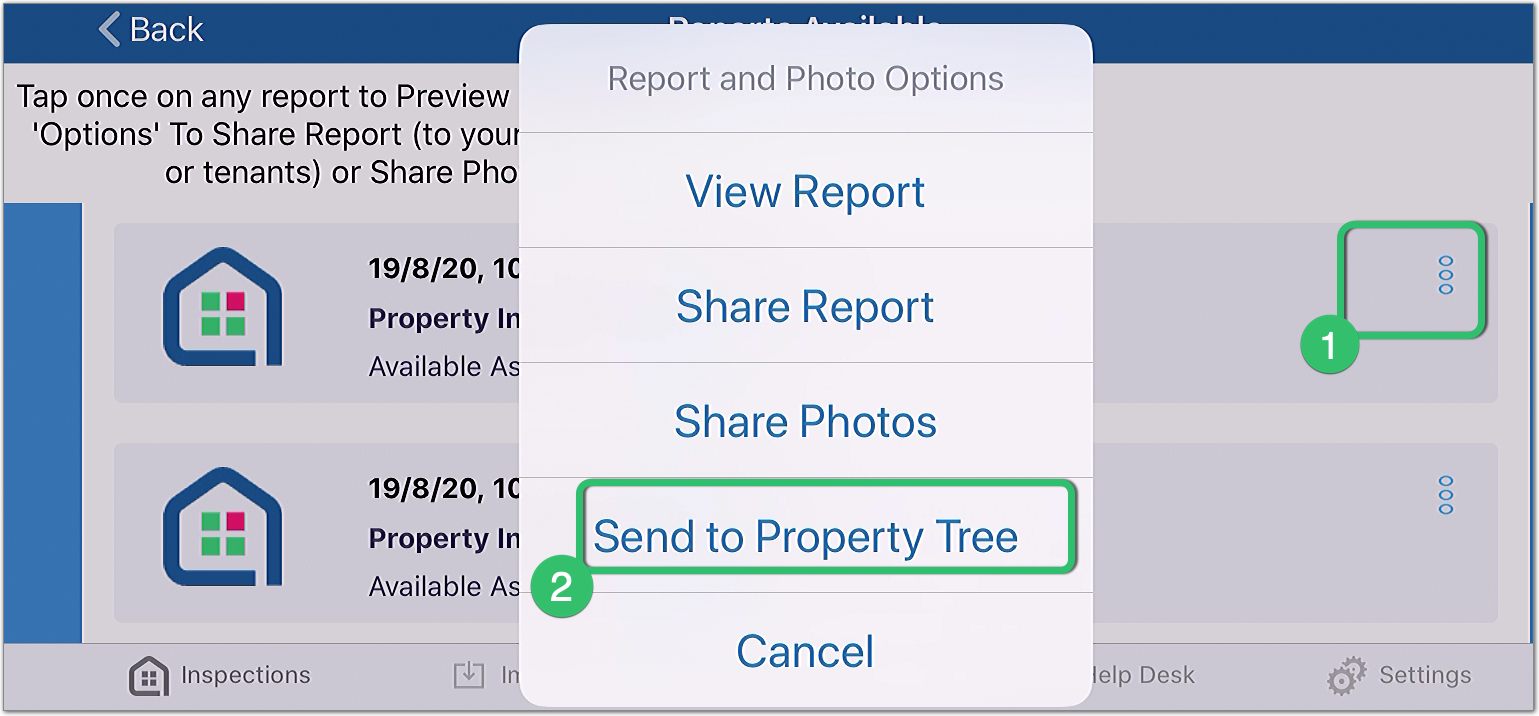
1Tap the Reports Folder from the inspection
2Select Send to Property Tree from Options
From Options (1) on the right, tap Send to Property Tree (2).

Improving your end-to-end workflow between PIM and MRI Property Tree
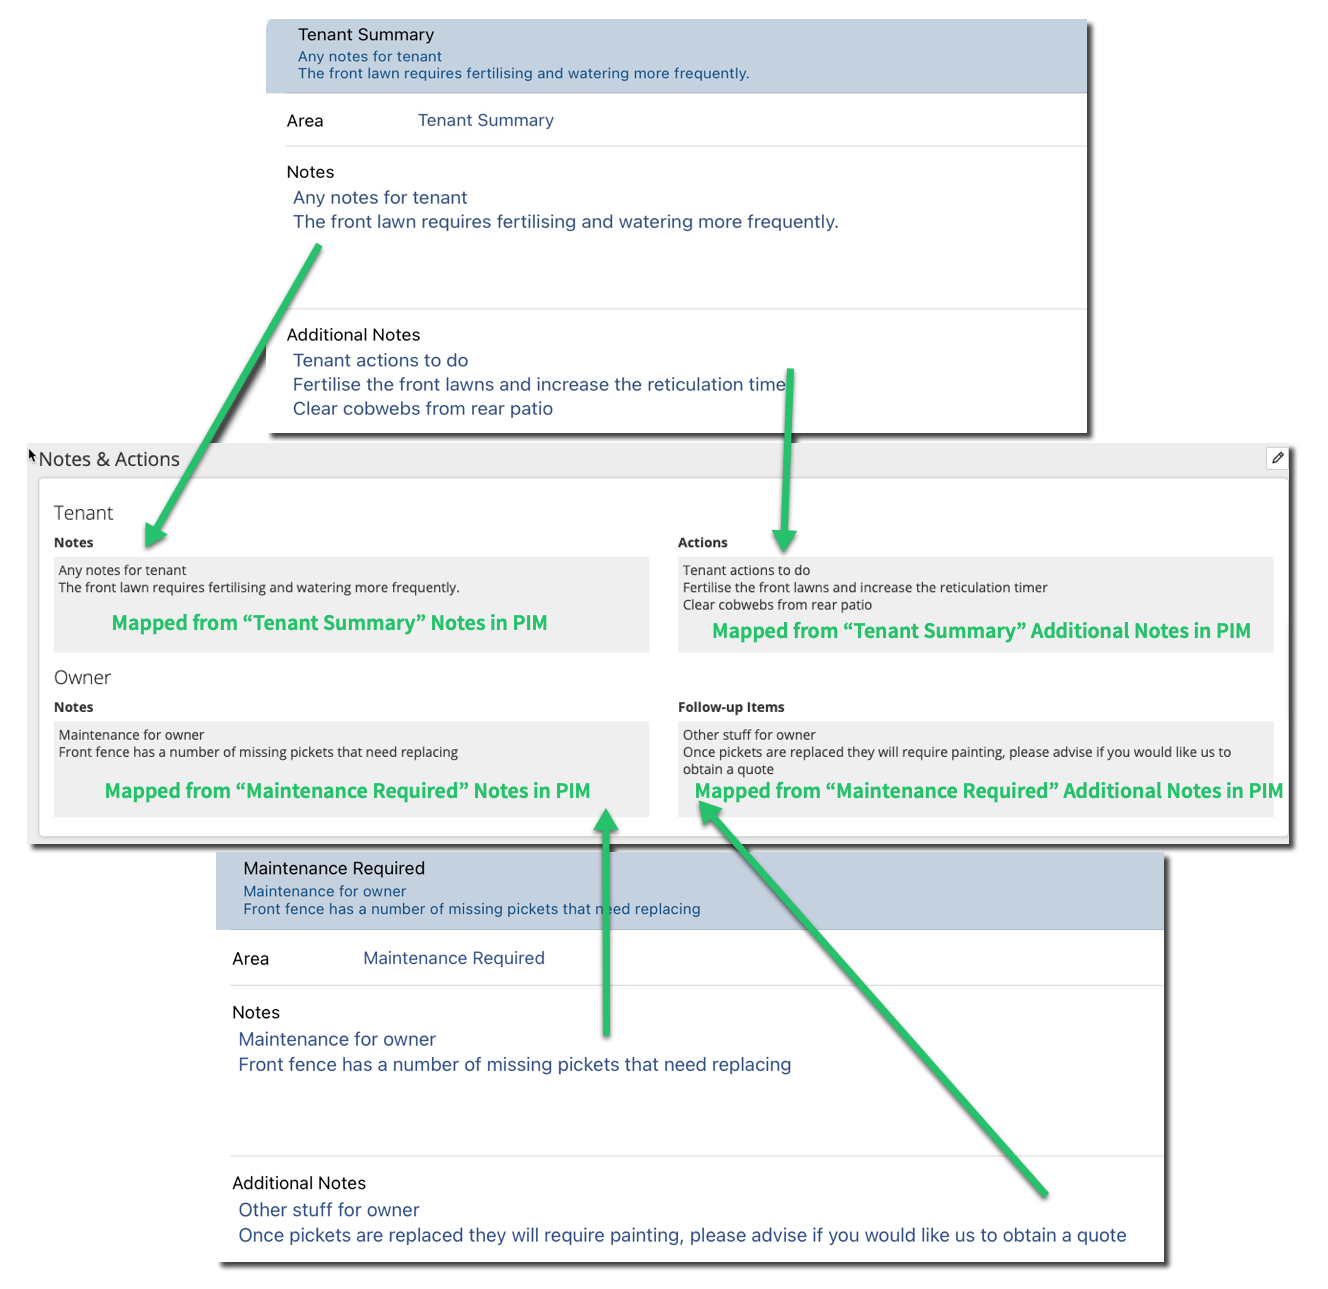
1Map your text from Callouts and Summary notes in PIM to MRI Property Tree
You can add notes against your Inspection Areas for Tenant Summary and Maintenance Required. These will upload back to MRI Property Tree for your Tenant and Owner Notes/Actions when you submit your inspection in PIM.
2Send the report to the owner directly from MRI Property Tree
Once you have submitted your inspection in PIM, you can log back into MRI Property Tree and send the report directly to your Owner/Landlord, including specific callouts or action items created at the time of inspection.

Navigate into your inspection in MRI Property Tree, tap the eye symbol, then tap Send Report to Owner (1).
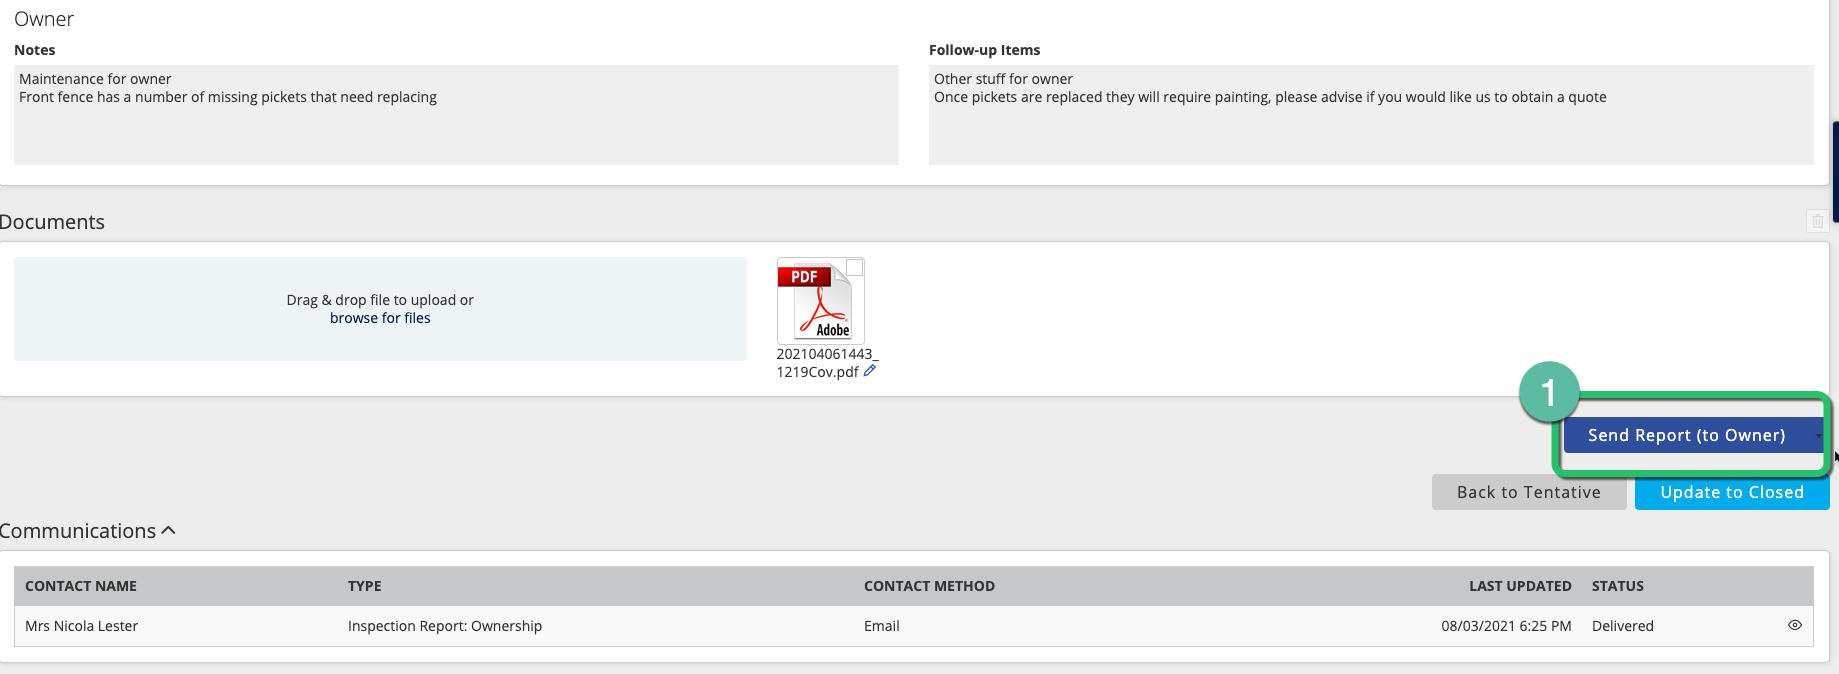
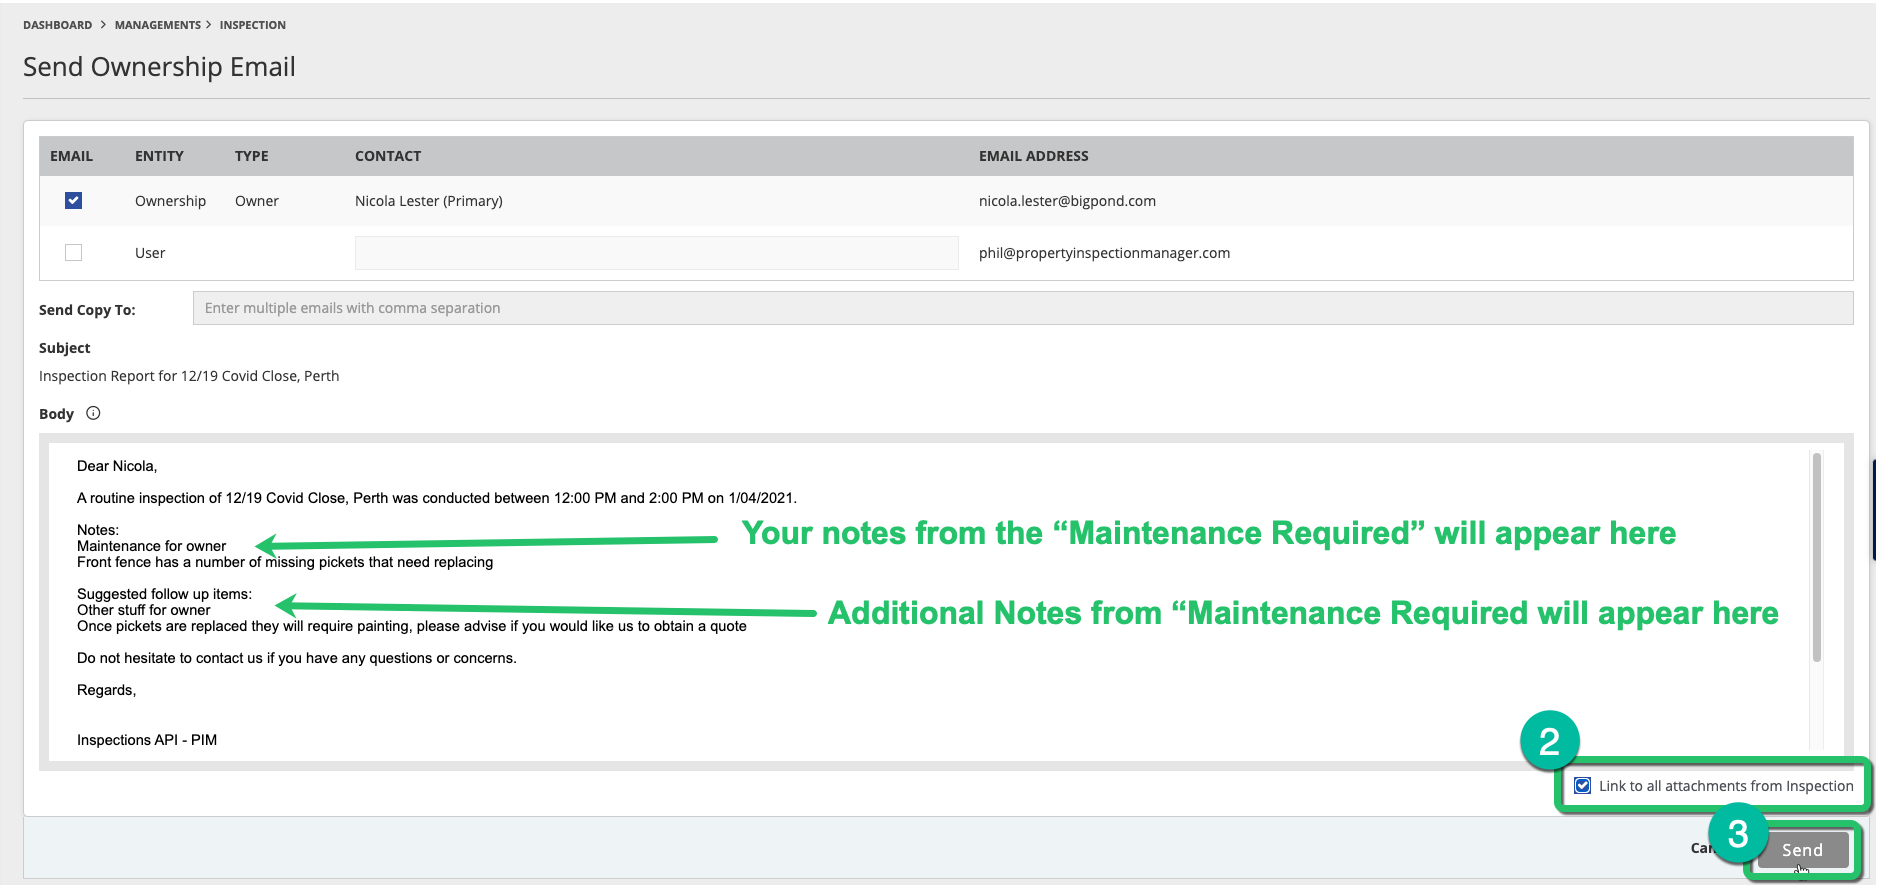
This will open your email to draft to the owner. Note how the "Maintenance Required", "Notes" and "Additional Notes" are mirrored from PIM. Click Link to all attachments from Inspection (2) to attach the uploaded report, then tap Send to the Owner (3).

Troubleshooting

Here are some common concerns and speed humps around MRI Property Tree integrations and how to move past them.

For general troubleshooting on MRI Property Tree workflows, imports and uploads, refer to the MRI Property Tree guide, watch this MRI Property Tree video, or contact MRI Property Tree support at MRI on 1300 657 700.

For PIM related questions, please contact PIM Support.

1Property Profiles not importing correctly
Most of the Property Types in MRI Property Tree can be created with the same Smart Property Profile name in PIM, however there are a few exceptions that need to be matched differently:
MRI Property Tree typeName needed in PIM
Residential: Semi DetachedSemidetached
Commercial: Commercial FarmingCommercialfarming
Commercial: Industrial/WarehouseIndustrial
Commercial: Land DevelopmentLanddevelopment
Commercial: OfficesOffice

If the imported inspection defaults to an incorrect profile, simply change this before starting the inspection. See the Smart Property Profiles Guide for more information.

2Submitted inspections not uploading to MRI Property Tree
Only inspections created from an import can be uploaded automatically into MRI Property Tree. This includes Routine, Tenant, Cleaning and Property Condition Reports. See the Uploading Reports Into Property Tree Guide for manual upload instructions.
3Inspection too large for MRI Property Tree
Reports can be imported into MRI Property Tree either through the API or directly via the MRI Property Tree dashboard. Please note that each report has a maximum file size of 30MB.

Was this article helpful?

That’s Great!

Thank you for your feedback

Sorry! We couldn't be helpful

Thank you for your feedback

Let us know how can we improve this article!

Select at least one of the reasons

Feedback sent

We appreciate your effort and will try to fix the article